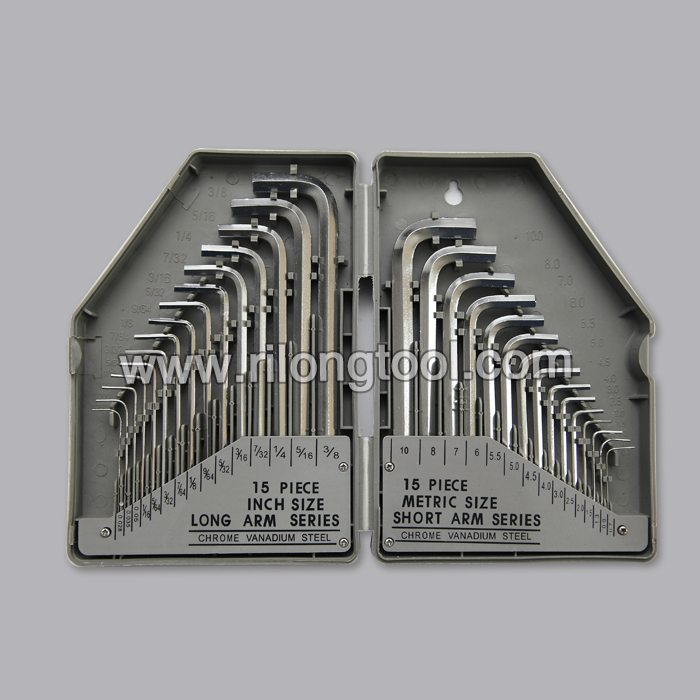
professional factory provide 30-PCS Hex Key Sets surface by Chromeplate packaged by BMC for Uruguay Manufacturer
Short Description:
Product Detail
Product Tags
"Quality first, Honesty as base, Sincere service and mutual profit" is our idea, in order to develop continuously and pursue the excellence for professional factory provide 30-PCS Hex Key Sets surface by Chromeplate packaged by BMC for Uruguay Manufacturer, We invites you and your enterprise to thrive together with us and share a bright future in global market.
Basic Information
■Model Number: RL-NLJ016
Additional Information
■Material: Chrome Vanadium Steel
■Size: 0.028″-3/8″, 0.7mm-10mm
■Surface Treatment: Chromeplate
■Heat Treatment: Optional
■Package: BMC + Double Blister Card
■OEM: Acceptable
■HS Code: 8204110000
■Samples: For FREE
■Delivery Time: Always 30 working days depending on the order quantity
■Packing: By standard cartons
Product Description
■Ningbo Rilong Hardware Tools Factory can provide various kinds of Hex Key with different sizes and packages.
Product Image
Buy from Amazon
https://www.amazon.com/gp/product/B0000CCXVZ/ref=as_li_tl?ie=UTF8&camp=1789&creative=390957&creativeASIN=B0000CCXVZ&linkCode=as2&tag=mrca06-20&linkId=U7TPUHSR3IEUE52I
View our full catalog of Knipex Hand Tools Direct from our Online Cart:
https://www.thetoolstore.ca/supplierItems.asp?idSupplier=759
TheToolStore.ca
114 Erie St N.
Leamington,ON,Canada
N8H 3A2
Phone: 1-888-768-8370
https://www.thetoolstore.ca