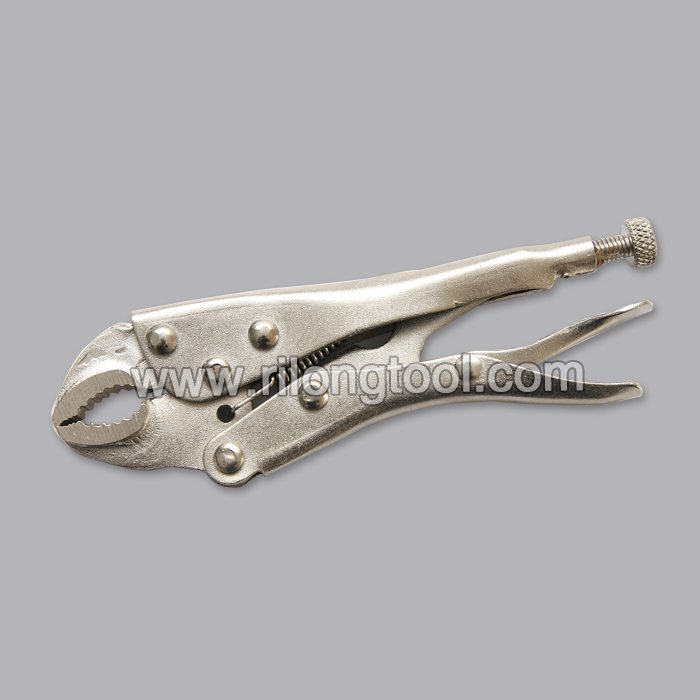
OEM Manufacturer 12″ Long Locking Pliers for Ghana Factory
Short Description:
Product Detail
Product Tags
abide by the contract", conforms to the market requirement, joins in the market competition by its high quality as well as provides more comprehensive and excellent service for clients to let them become big winner. The pursue of the company, is the clients' satisfaction for OEM Manufacturer 12″ Long Locking Pliers for Ghana Factory, We will wholeheartedly welcome all clients in the industry both at home and abroad to cooperate hand in hand, and create a bright future together.
Basic Information
■Model Number: RL-DLQ016
Additional Information
■Material: A3# steel (Q235) or 45# steel
■Size: 12”
■Surface Treatment: Nickel-plated, Zinc-plated, Black Oxide, Electrophoresis
■Heat Treatment: Optional
■Package: Blister Card, Suction Card, Tie Card, Double Blister Card
■OEM: Acceptable
■HS Code: 8203200000
■Samples: For FREE
■Delivery Time: Always 30 working days depending on the order quantity
■Packing: By standard cartons
Product Description
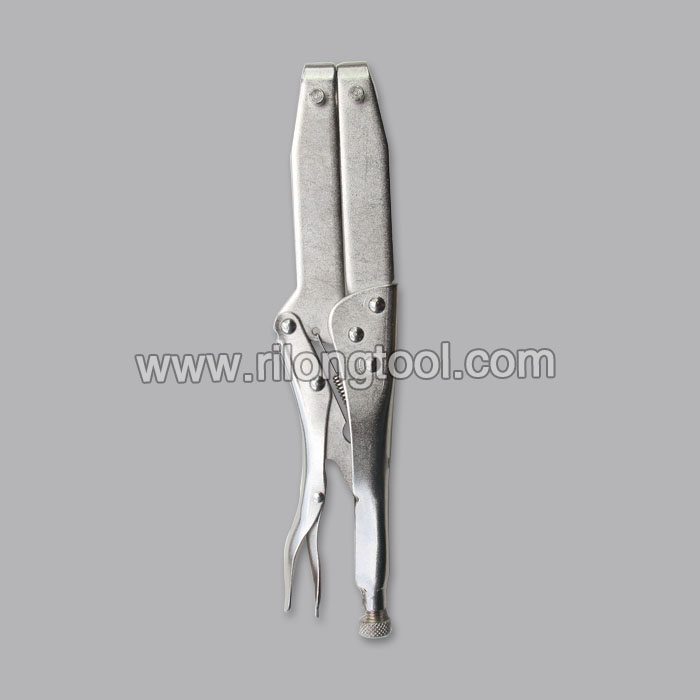
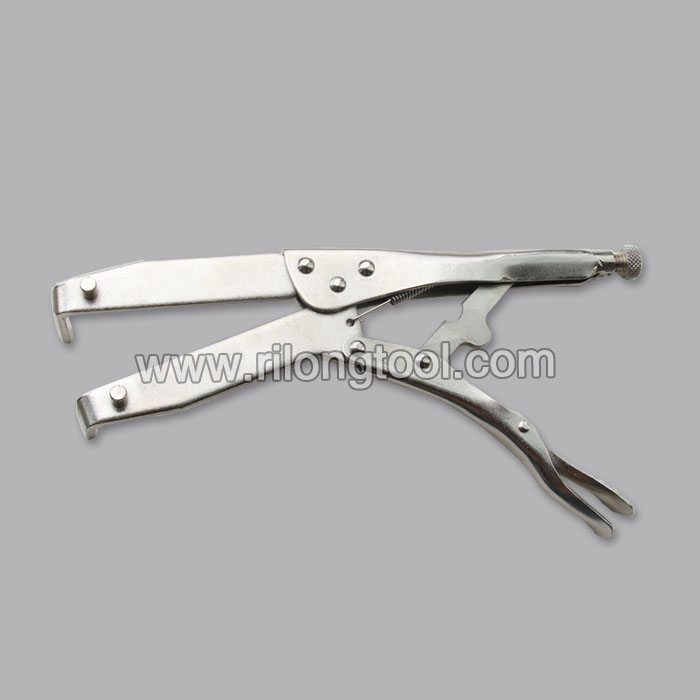
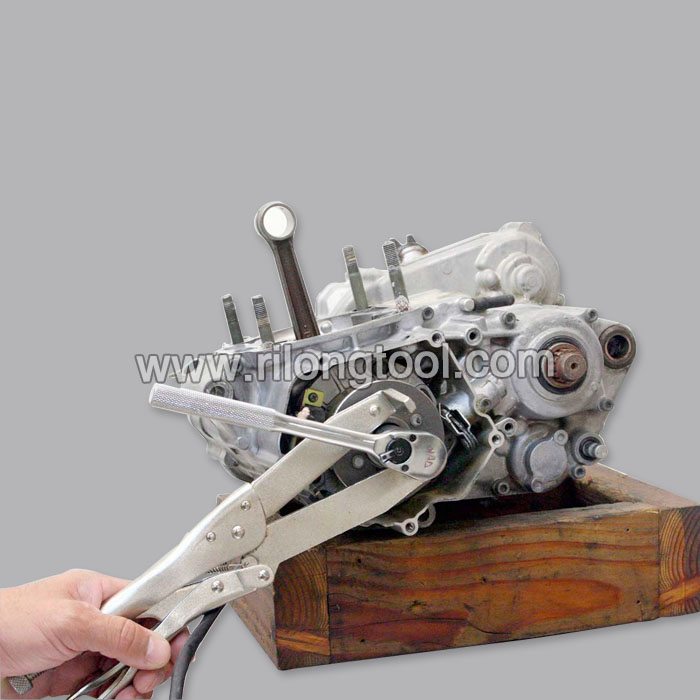
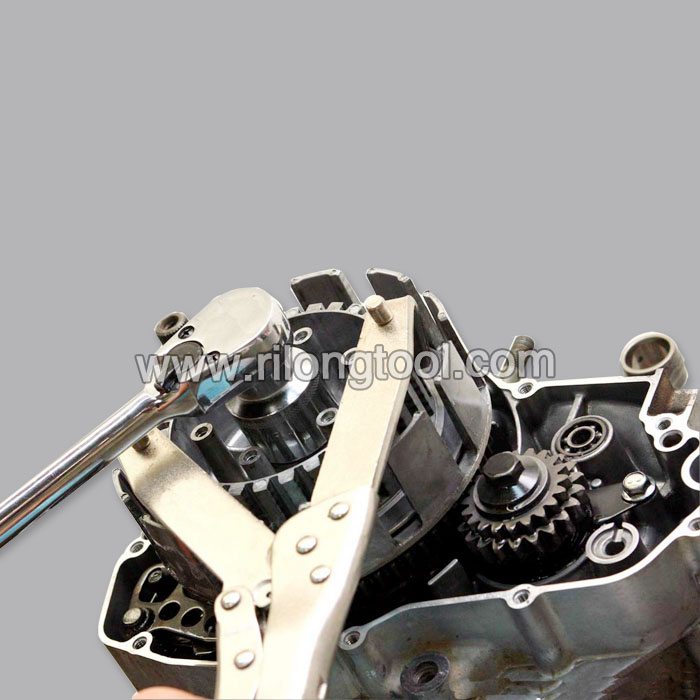
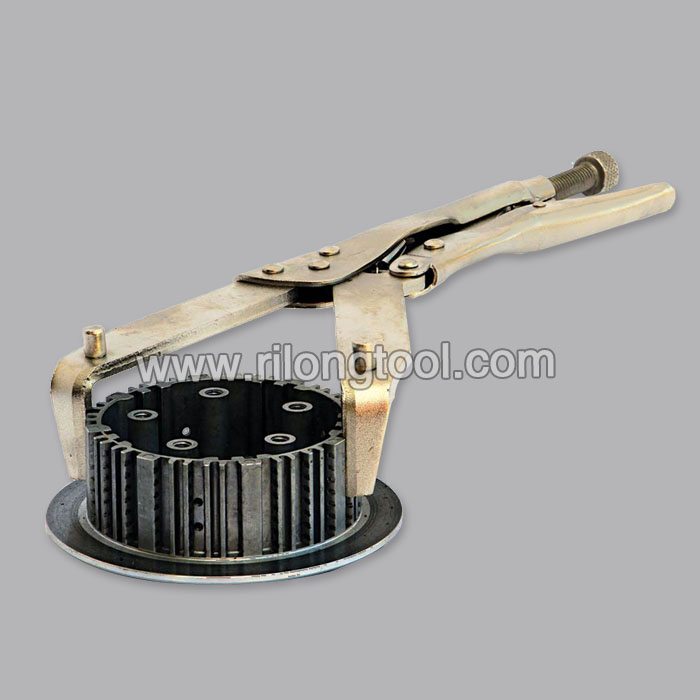
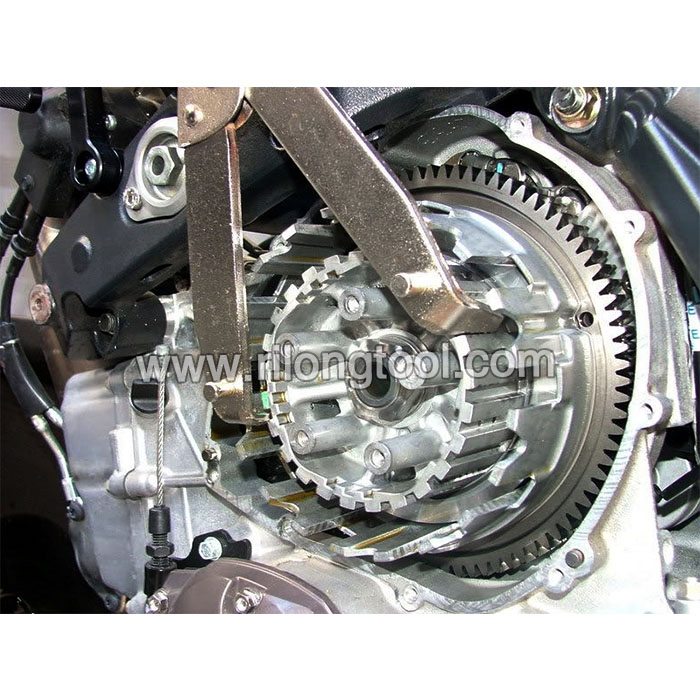
■Mainly used for clamping parts to rivet, weld, grind and so on, which is characterized by the powerful clamp force produced by the jaw. It can lock tight so that the parts won’t fetch away. Besides, jaws have a lot of levels to adjust for the use of different thickness of parts, and it also can be used as a wrench.
■Flexible using, long life and good tenacity.
■The screw tuning button can give the best clamp size easily.
Product Image
How to unlock any barrel/cylinder lock.
Sally Field and James Garner star in this charming comedy about a young divorcee, with a 12-year old son, who moves to a small Arizona town and falls in love with an older, widowed pharmacist. An unwanted visit from ex-husband doesn’t prevent her from pursuing a relationship with the charismatic James Garner. © 1985 Columbia Pictures Industries, Inc. All Rights Reserved.