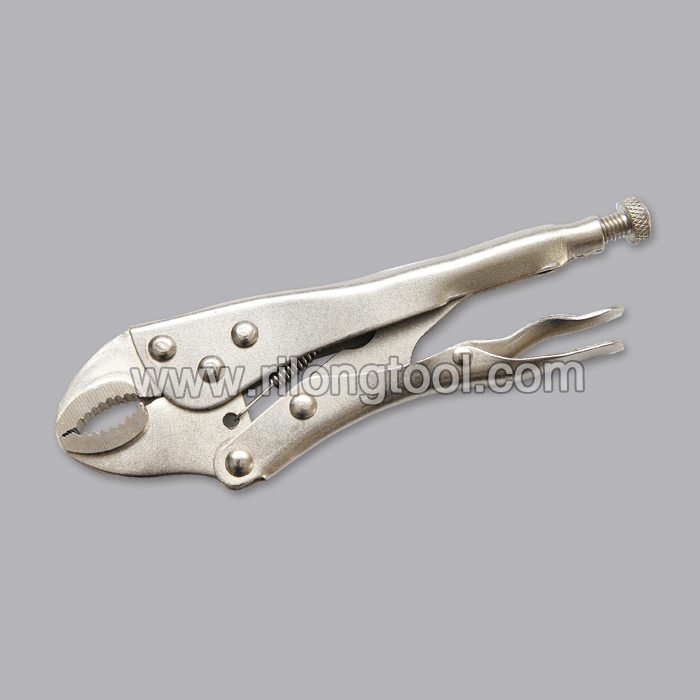
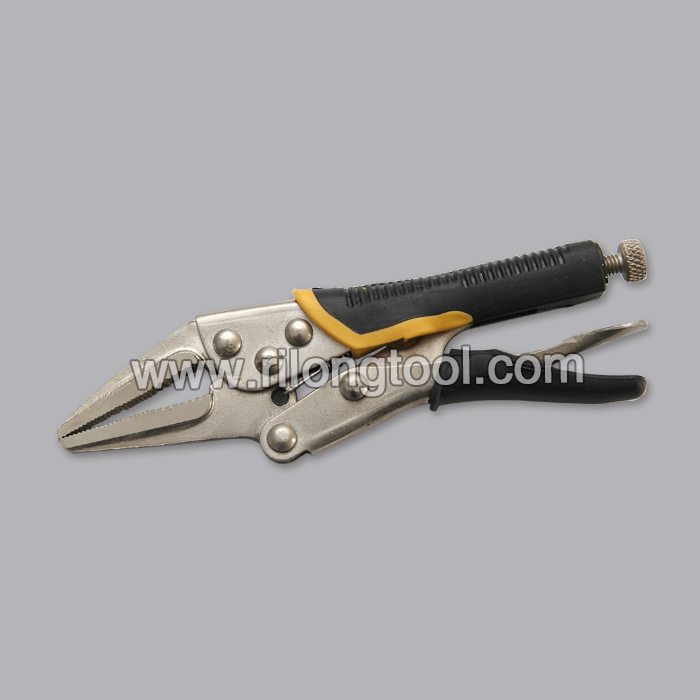
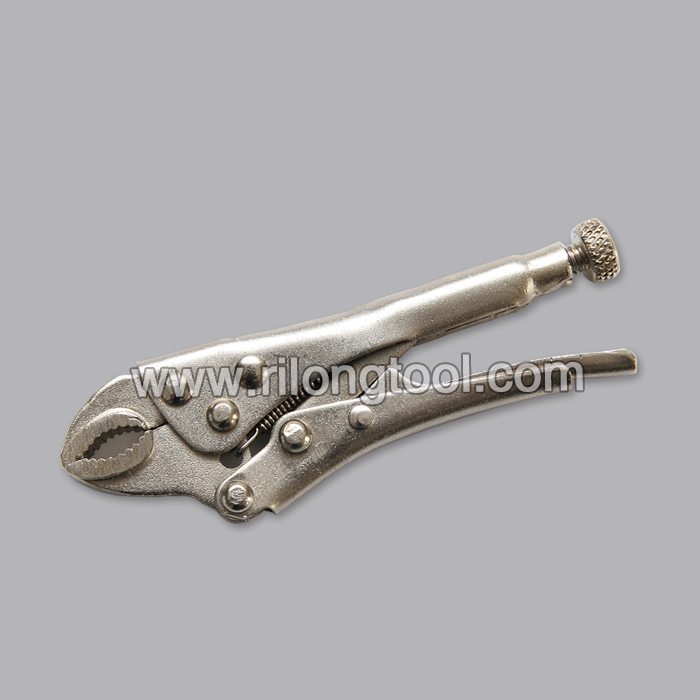
Hot New Products 11″ C-clamp Locking Pliers for Nigeria Importers


Short Description:
Product Detail
Product Tags
Always customer-oriented, and it's our ultimate target to be not only the most reliable, trustable and honest supplier, but also the partner for our customers for Hot New Products 11″ C-clamp Locking Pliers for Nigeria Importers, We welcome new and old customers from all walks of life to contact us for future business relationships and achieving mutual success!
Basic Information
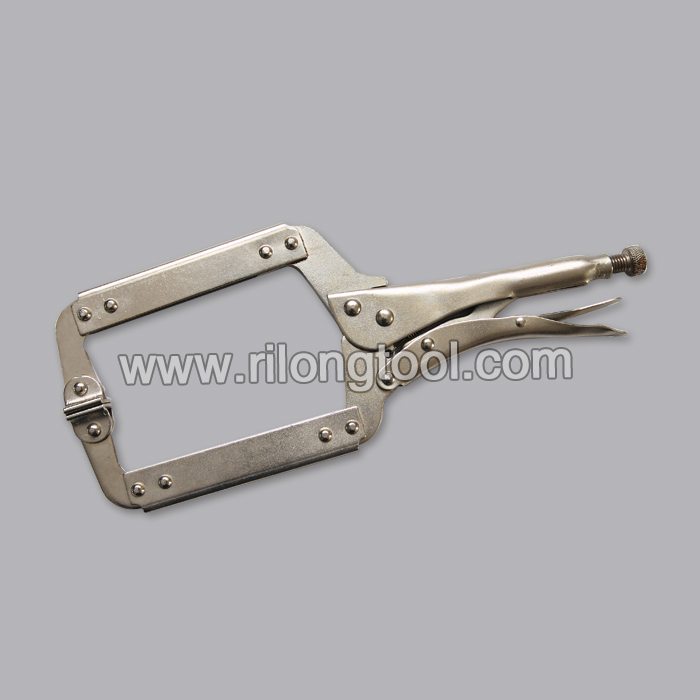
■Model Number: RL-DLQ019
Additional Information
■Material: A3# steel (Q235) or 45# steel
■Size: 11”
■Surface Treatment: Nickel-plated, Zinc-plated, Black Oxide, Electrophoresis
■Heat Treatment: Optional
■Package: Blister Card, Suction Card, Tie Card, Double Blister Card
■OEM: Acceptable
■HS Code: 8203200000
■Samples: For FREE
■Delivery Time: Always 30 working days depending on the order quantity
■Packing: By standard cartons
Product Description
■Mainly used for clamping parts to rivet, weld, grind and so on, which is characterized by the powerful clamp force produced by the jaw. It can lock tight so that the parts won’t fetch away. Besides, jaws have a lot of levels to adjust for the use of different thickness of parts, and it also can be used as a wrench.
■Flexible using, long life and good tenacity.
■The screw tuning button can give the best clamp size easily.
Product Image
Ignition Lock Change with Dent Puller (Slide Hammer). This was actually the preferred methods of removing and old ignition lock cylinder, even at the GM dealers, since it was a lot faster than taking everything apart and using a special tool. You do need to have a screw that fits exactly into the keyhole for this to work smoothly with no problems.
I used to work with people that did body shop repairs and painted cars at the dealership. Using the slide-hammer was the standard way to change out an ignition lock at the dealership.
For the older 1970′s General Motors (GM) cars such as Chevy, Pontiac, Oldsmobile and Buick this method works excellent.
I will loch the steering wheel on this car with a big padlock and thick cable when I park somewhere else to help prevent theft.
Demon Carb on a ’78 El Camino, 350, 4 speed , posi
Ignition Lock Change w’ Dent Puller FAST WAY on a ’78 El Camino
https://www.youtube.com/watch?v=E1Z3OZBV
How to Change Power Steering Pump Oil
’78 El Camino Hauling Concrete for the Putin Cat Tower (Cat Tree)
1978 El Camino – Troubleshooting Horn Wiring & Relay
Super-size Battery for the ’78 El Camino
!978 El Camino, old work truck
Remove Windshield Trim w’ Good Cheap Tools
Headliner Idea for the EL CAMINO
El Camino Exhaust System, New & re-use the old
Reseal Tire w’ Bead Seal on ’78 El Camino
’78 El Camino, Resealing Front Windshield, Kill Rust, Stop Water
’78 El Camino Valve Cover Gaskets, Even Simple Stuff can take TIME
COOPER Winter Tires, USA Made, USA Owned, ’78 El Camino Install Tips
’78-’87 El Camino, Install Stock Gauges, dash lights & Fix Tach
’78-’87 Chevy Location of Power to Dash Gauges from Circuit
Rare El Camino, Factory 4 speed, Posi, Bucket Seats
Water Temp Gauge problem solved, ’78 El Camino
1978 El Camino, Small Hard to Find Parts
4 Speed Saginaw, shift shaft seals, ’78 El Camino
’78 El Camino, Reliability, Battery Cables & Rotor
’78 El Camino, Repair Clutch Linkage & Z bar
How to make your Brake lights BRIGHTER
’78 El Camino – Fix a Small Dent
1978 El Camino, Tach removal & typical repair
stuff millennials need to know,
Things millennials don’t know,
millennial survival tips
Some quick links to a few of the materials I used:
[✓] 12 v transformer (3 amp): https://amzn.to/2cmkPFo
[✓] 3 position switch: https://amzn.to/2cGZjKL
[✓] Push on/off 1000w dimmer switch: https://amzn.to/2c9gXEm
Try Audible with a free audiobook. No Shipping, No Waiting. Try instantly at https://www.audible.com/thekingofrandom
Thanks Audible. … Now onto making the “Styro-Slicer”!
This homemade, foam slicer makes 3D puzzles, foam swords, guns, and traces any other styrofoam shape with an incredible amount of precision and control.
Endcard Links:
Arc Welder: https://goo.gl/ZmccT9
Rocket Rifle: https://goo.gl/cqWcvB
Bitty-Q: https://goo.gl/2aHDv4
Mini Arc Furnace: https://goo.gl/GOpGs9
Next Video: “Gas Blaster” Propane Torch: https://goo.gl/tXsooL
Previous Video: The Hot-Wire “Styro-Slicer”: https://goo.gl/AO7ZaJ
See What Else I’m Up To:
Instagram: https://goo.gl/C0Q1YU
Facebook: https://bit.ly/FBTheKingOfRandom
Pinterest: https://bit.ly/pingrant
Business Inquiries: For sponsorship requests or business opportunities please contact me directly: https://www.youtube.com/thekingofrandom/about
FTC Disclaimer: This video was sponsored by Audible.com. (#ad) Try Audible with a free audiobook. No Shipping, No Waiting. Try instantly at https://www.audible.com/thekingofrandom
WARNING:
The electrified wire of the “Styro-Slicer” can reach temperatures well above 1,000ºF, which can cause burns, and potentially start fires. This project should only be attempted with adequate knowledge and training, and under constant adult supervision. Have fun, but always think ahead, and remember that any project you try is at YOUR OWN RISK.
Music By: TheFatRat – Licensed by Tasty
Song Title: Xenogenesis
Music Video: https://www.youtube.com/watch?v=_nabH…
Label Channel: https://youtube.com/tasty”
Project Inspired By:
Wire foam cutting machines for sale on the internet, but too pricy to actually consider paying for.
Project History & More Info:
This is the final video on the Styro-Slicer itself.
A lot of people have been asking why I made 2 Quick Clips, and 2 Projects for this one system. And I’m happy to explain.
The first Quick Clip was to introduce the styro-slicer, and show what it could do. It introduced the concept that it exists, that it could make styrofoam swords, guns, and airplanes, and that it compacts back together for storage.
The project video that followed (https://goo.gl/AO7ZaJ) was a fully produced tutorial of how to use it. It showed all of it’s different features and operation, and took over 5 minutes to demonstrate. So that required a video of its own.
The 2nd Quick Clip was to preview the styro-slicer tutorial, and I put enough information in there that savvy viewers could figure out how to build it before the tutorial. And apparently some people did.
This video is the final installment, showing step by step how to make the styro-slicer. Also with this tutorial being 3-4 times longer than regular videos, it takes 3-4 times longer to produce, and since I try to put out a video posted randomly, the Quick Clips gave me a chance to show the project, and just enough breathing room to get the tutorial produced and released.
This video is all about making the Styro-Slicer, but doesn’t get into great detail about how to use it.
Although the build is fairly simple, there is a sizable materials list and the video can seem quite technical. But I promise that if you take it one step at a time, you’ll get it finished.
I made 3 previous prototypes of this model. Each one giving me new experience and insight into what I wanted the finished product to be able to do.
The ultimate success came when the design for compact storage actually worked out, and the assembly could compact together for quick storage. I am still very excited and proud about that feature ![]()
I took a lot of inspiration from different pictures on Google image searches, of professional foam cutting machines. I was inspired by different features, like cutting at angles, and adjusting the temperatures, and wanted to replicate those features.
My first prototype took just over 15 minutes to put together, and used a scrap 2″x4″ piece of wood, a piece of picture hanging wire, and was powered by a transformer I ripped out of an old stereo.
It worked great, but it was also really crude and I didn’t have time to make a nice version for my metal casting videos, so I never did mention it until recently. But I always had intentions to fully develop it.