Factory wholesale 12-PCS Hex Key Sets packaged by plastic frame Supply to Finland

Short Description:
Product Detail
Product Tags
With a sound business credit, excellent after-sales service and modern manufacturing facilities, we have earned an excellent reputation among our customers across the world for Factory wholesale 12-PCS Hex Key Sets packaged by plastic frame Supply to Finland, We welcome customers, business associations and friends from all parts of the world to contact us and seek cooperation for mutual benefits.
Basic Information
■Model Number: RL-NLJ010
Additional Information
■Material: 45# Carbon Steel
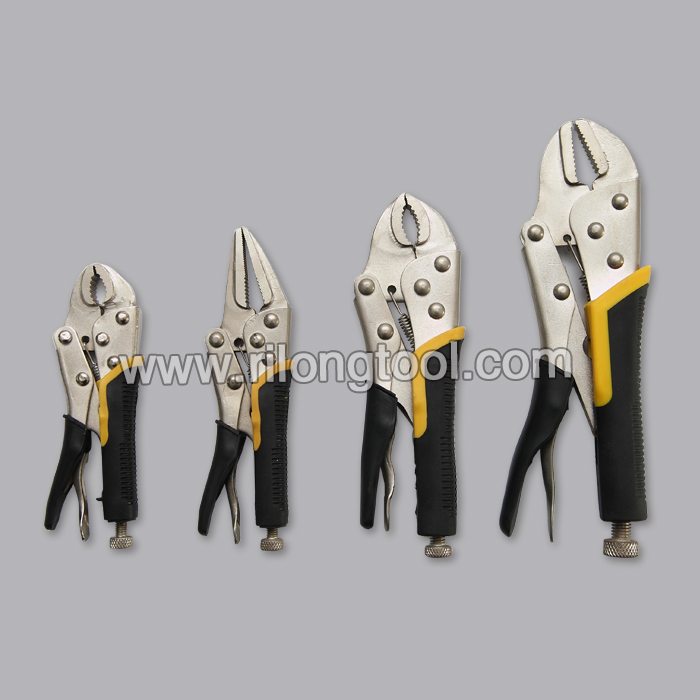
■Size: 1/16″-3/8″, 1.5mm-10mm
■Surface Treatment: Zinc-plated, Black Oxide
■Heat Treatment: Optional
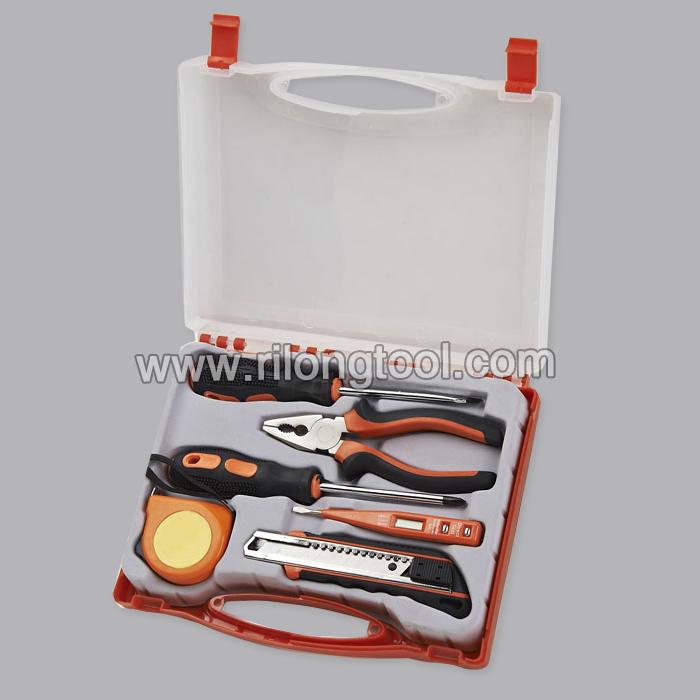
■Package: Plastic Frame
■OEM: Acceptable
■HS Code: 8204110000
■Samples: For FREE
■Delivery Time: Always 30 working days depending on the order quantity
■Packing: By standard cartons
Product Description
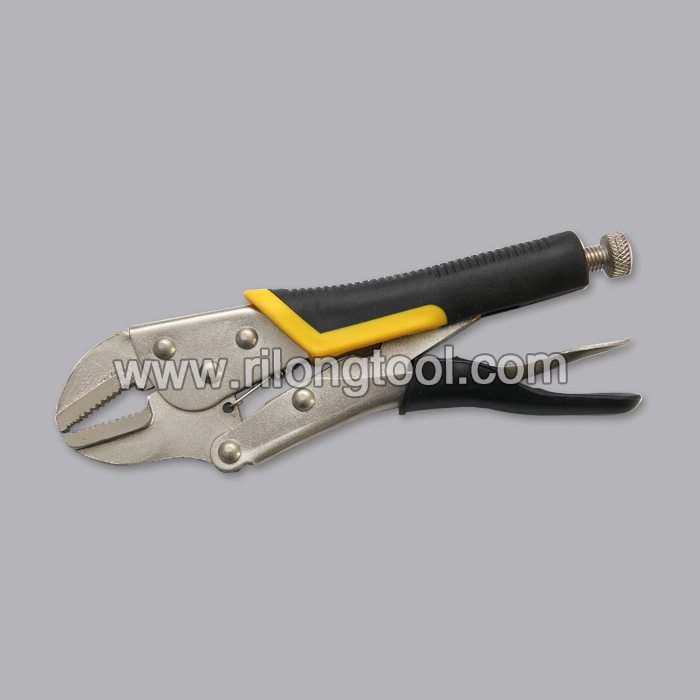
■Ningbo Rilong Hardware Tools Factory can provide various kinds of Hex Key with different sizes and packages.
Product Image
As I wandered around Shot Show 2015, I stopped off at Gerber to see what they had that was new and interesting. I was drawn to some of their military-line, and this item – the Short Stack – was in that area. This tiny multi-tool is made to fit into a Magpul pistol grip (a variety of them) and it will do a ton of work for you in the field or at the range. Check out the video for more info.
_______
Want to purchase EDC, tactical, emergency, or survival items? I’d be very thankful if you would use the following link to support Everyday Tactical Vids when you search for gear on Amazon:
https://tinyurl.com/ETV-Amazon-Search
_______________
Here are links to some of my favorite EDC, tactical, emergency, outdoor, and survival items:
- 5.11 ATAC PLX Flashlight:
https://tinyurl.com/5-11-ATAC-PLX-Flashlight
- Surefire P2X Fury Flashlight:
https://tinyurl.com/Surefire-P2X-Fury-Flashlight
- Benchmade Griptilian:
https://preview.tinyurl.com/Benchmade-Griptilian-Knife
- Blackhawk Roll-out Medical Bag:
https://tinyurl.com/Blackhawk-Rollout-Medical-Bag
- UTG Messenger Bag:
https://tinyurl.com/UTG-Messenger-Bag-Options
- Condor Messenger Bag:
https://tinyurl.com/Condor-Messenger-Bag-Options
- Bahco Laplander Folding Saw:
https://tinyurl.com/Bahco-Laplander-Folding-Saw
- Mora Companion Knife:
https://tinyurl.com/Mora-Companion-Knife
- KaBar BK2:
https://tinyurl.com/Ka-Bar-BK2
- Klean Kanteen Water Bottles:
https://tinyurl.com/Klean-Canteen
- Corona Folding Saw:
https://tinyurl.com/Corona-Folding-Saw
- Schrade SCAXE2:
https://tinyurl.com/Schrade-SCAXE2
- Various Kinds of Paracord:
https://tinyurl.com/Paracord-550-Cord
- Emergency Mylar Blankets:
https://tinyurl.com/Emergency-Mylar-Blankets
- Survivor Fire Starter:
https://tinyurl.com/Survivor-Fire-Starter
- CRKT Woods Chogan Tomahawk:
https://tinyurl.com/CRKT-Woods-Chogan-Tomahawk
______________________________
Everyday Tactical Vids: Thinking Tactically, Living Purposefully
Everyday Tactical Vids exists to help individuals become an asset to self and others in everyday life and crisis situations.
The 6 Core Areas of Everyday Tactical Vids:
- Soul: Asking the deeper questions of our existence and why we live as we do
- Body: Taking care of the physical body through fitness and medical care
- Psychology: Working to understand our own minds and the minds of others in crisis situations
- Skills: Applying knowledge to the point of proficiency
- Gear Selection: Choosing the right gear for the job or situation
- Location: Where am I and how does that impact all other 5 Core Areas
_______________________________________________________
FOLLOW EVERYDAY TACTICAL VIDS:
YouTube – https://www.youtube.com/EverydayTacticalVids
Twitter – https://twitter.com/EverydayTactic1
Facebook – https://www.facebook.com/pages/Everyday-Tactical-Vids/396490423756541
Instagram – https://instagram.com/everyday_tactical_vids/
Tumblr – https://everydaytacticalvids.tumblr.com/
Google+ – https://tinyurl.com/EverydayTacticalVidsGooglePlus
RELATED VIDEOS:
- Car Survival Kit / Emergency Bag: https://www.youtube.com/watch?v=8-ansf_-KSU
- Compact Survival Kit: https://www.youtube.com/watch?v=uj5046AzrUA
- Home Depot Urban Survival Kit: https://www.youtube.com/watch?v=cLHI4XQO1Sk
- Bug-out Bag, Walmart Style: https://www.youtube.com/watch?v=ulrVJdiL484
SOME OF OUR MOST POPULAR POSTS:
- Last Ditch Survival Kit:
- Interview – Travis Haley of Haley Strategic: https://www.youtube.com/watch?v=vKdt-8XzPHU
- Tim’s EDC/Everyday Carry Bag: https://www.youtube.com/watch?v=MZrqJbcYH-g
PEOPLE WHO HAVE BEEN AN INFLUENCE ON EVERYDAY TACTICAL VIDS:
- Lt. Colonel Dave Grossman, originator of The Sheepdog Concept
- Travis Haley of Haley Strategic
- Chris Costa of Costa Ludus
- The team over at ITS Tactical
- NutnFancy and his YouTube channel/community
- Tom Brown Jr. of The Tracker School
- Dave Canterbury of The Pathfinder School
- Rob Pincus of I.C.E. Training
Video tutorial on how to apply a rubber coated handle to tools. The product I am using is a dip rubber coating made by Plasti Dip and is available in a few different colors. You can be limited on the length of the handles as the can isn’t incredibly deep. This is a great way to protect your tools, give them a personalized look, provide some form of insulation, and increase the grip.
4 Ways How to Remove Rust: https://www.youtube.com/watch?v=UY9rLa5mqAw
Website: https://4diyers.com
Patreon: https://www.patreon.com/4diyers
Facebook: https://www.facebook.com/4diyers
Google Plus: https://plus.google.com/+4DIYers
Twitter: https://twitter.com/4DIYers
Instagram: https://www.instagram.com/4diyers/
Tumblr: https://4diyers.tumblr.com
Pintrest: https://www.pinterest.com/4diyers/
Tools/Supplies Needed:
-duff knife
-wax and grease remover
-pliers or whatever tools you’d like to apply the rubber coating to
-heat gun
-stiff wire
-paper, cardboard, or pan
-rubber dip coating
Procedure:
-here I have an older set of needle nose pliers which I will be replacing the rubber coating on
-as you can see, the existing rubber coating is in rough shape
-remove the existing rubber coating
-sometimes you can slide these off, other times use a dull knife to score the rubber handle and then peal it off
-the dull knife will reduce the risk of scratching the coating underneath which helps protect the pliers against rust
-now peal the rubber off
-clean up the handles using some form of a wax and grease remover which doesn’t leave a coating behind
-this will remove any contaminants which can cause adhesion problems or prevent sealing which will allow moisture in, eventually causing rust
-if your handles are rusty, this rust must be removed, otherwise it will eventually worsen under the coating
-after the rust has been remove, clean up again with a wax and grease remover and apply a light coat of primer just to the handles, where the coating will cover that up so it’s hidden
-the pliers will need to be hung up, so have something ready before we start dipping
-here I’m using a heavier wire wrapped around the tip which won’t be in contact with the coating
-use a heat gun on the handles to dry up any moisture if any which can be trapped underneath and cause corrosion in the future
-depending on the width of the pliers, you maybe able to coat both at the same time or only each individually
-mix the coating accordingly
-be sure to read the instructions on the side of the can depending on what coating you are working with
-submerge the handles and then extract them slowly
-it’s important to apply the coating on a day with lower humidity as it will affect dry time
-also do not work in windy conditions as this will cause problems as well
-it’s good practice to hang them up above paper, cardboard, or a pan to catch drips and for easy clean up
-allow them to dry for about 30min
-now apply a second layer
-finally a third layer
-you will want to apply at least three layers to provide a stronger durability
-allow them to harden and you’re done
Thank you to all those who watch my videos and support my content. Don’t forget to subscribe to my channel for future tutorial videos and like my video if you found it helpful. New videos are always being uploaded every week!
© 4DIYers 2013
All Rights Reserved
No part of this video or any of its contents may be reproduced, copied, modified or adapted, without the prior written consent of the author.