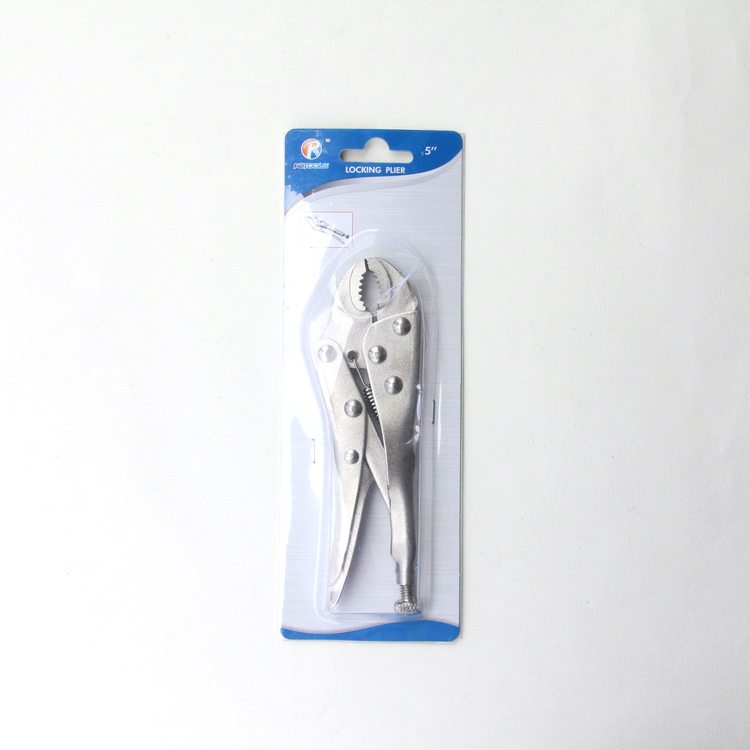
Factory Supplier for 18″ C-clamp Locking Pliers Cairo Factories
Short Description:
Product Detail
Product Tags
No matter new customer or old customer, We believe in long term and trusted relationship for Factory Supplier for 18″ C-clamp Locking Pliers Cairo Factories, We warmly welcome merchants from home and abroad to call us and establish business relationship with us, and we will do our best to serve you.
Basic Information
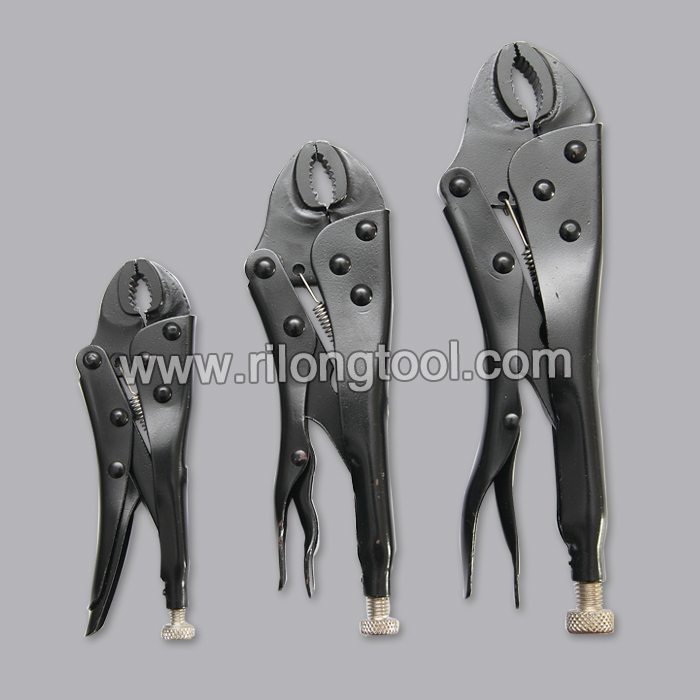
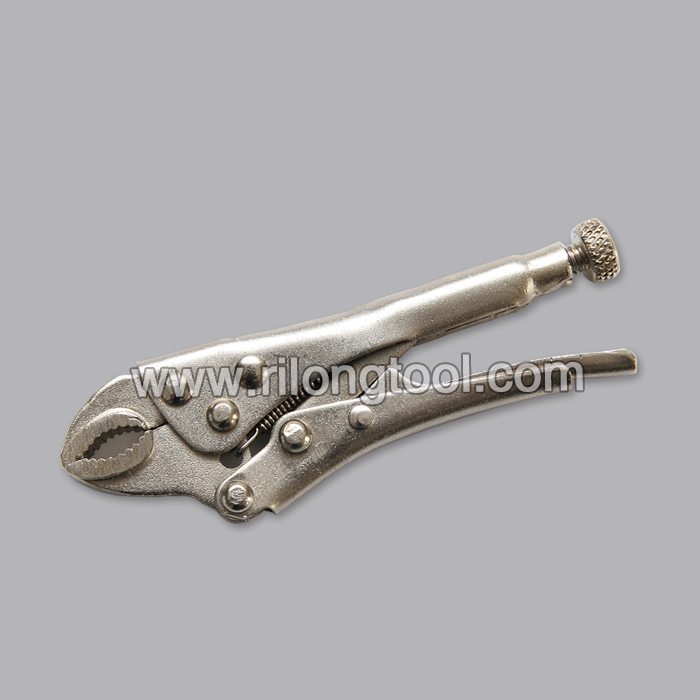
■Model Number: RL-DLQ021
Additional Information
■Material: A3# steel (Q235) or 45# steel
■Size: 18”
■Surface Treatment: Nickel-plated, Zinc-plated, Black Oxide, Electrophoresis
■Heat Treatment: Optional
■Package: Blister Card, Suction Card, Tie Card, Double Blister Card
■OEM: Acceptable
■HS Code: 8203200000
■Samples: For FREE
■Delivery Time: Always 30 working days depending on the order quantity
■Packing: By standard cartons
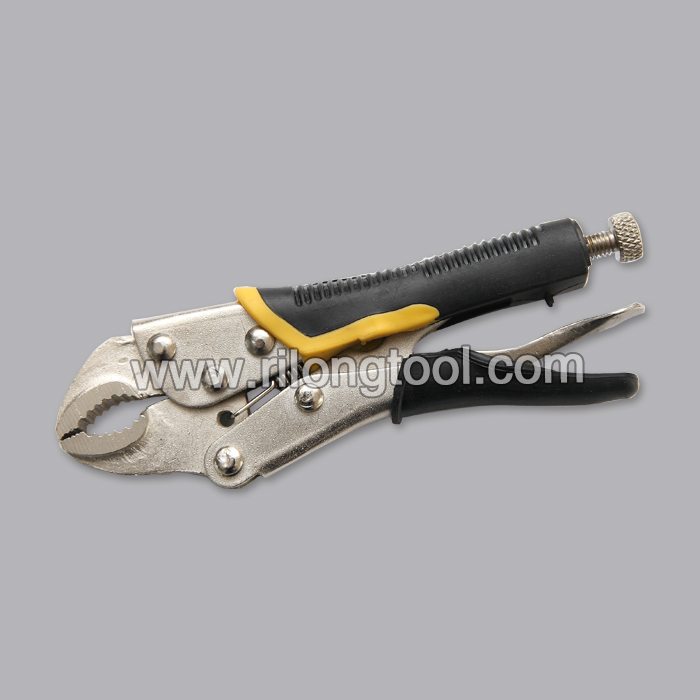
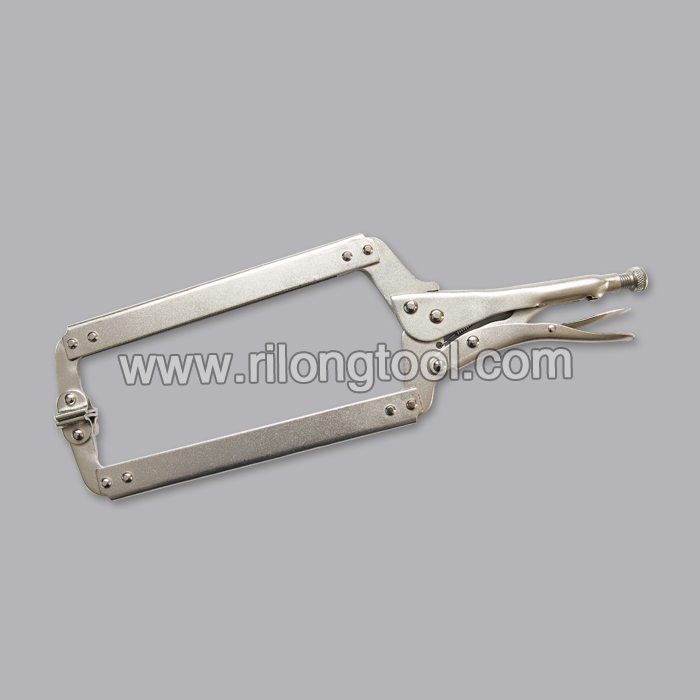
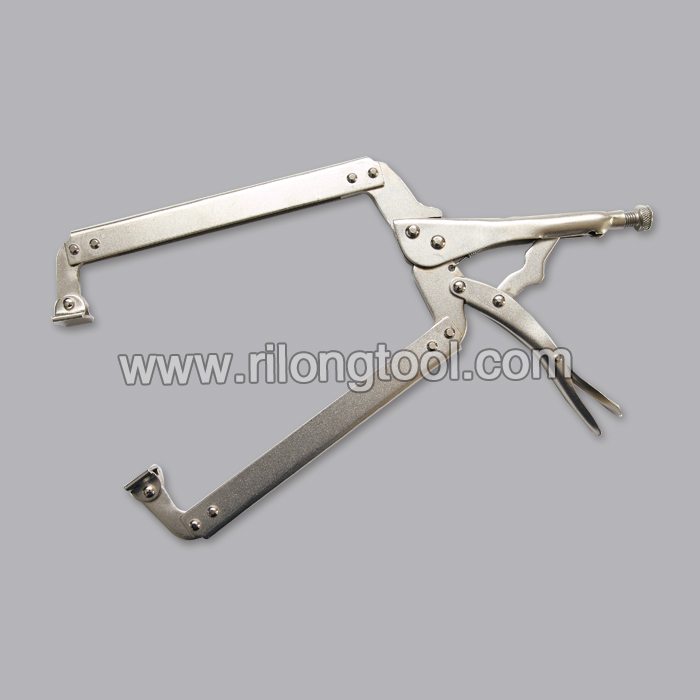
Product Description
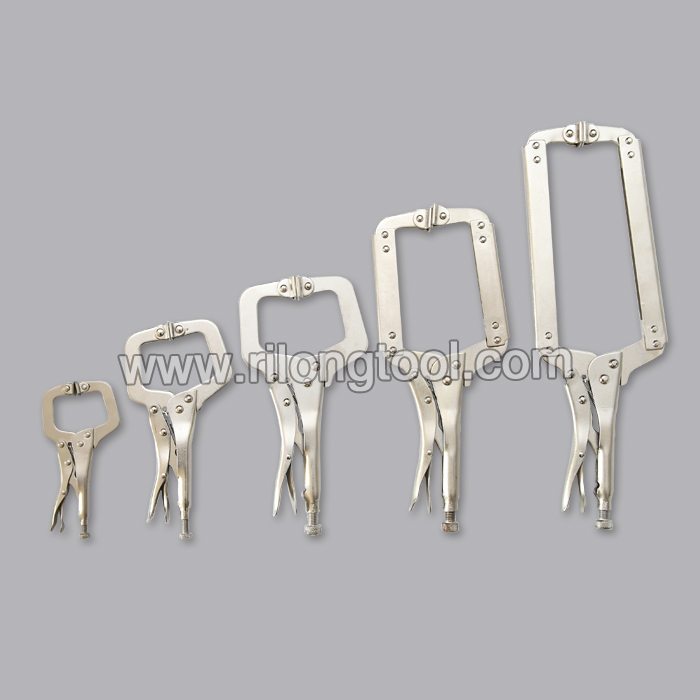
■Mainly used for clamping parts to rivet, weld, grind and so on, which is characterized by the powerful clamp force produced by the jaw. It can lock tight so that the parts won’t fetch away. Besides, jaws have a lot of levels to adjust for the use of different thickness of parts, and it also can be used as a wrench.
■Flexible using, long life and good tenacity.
■The screw tuning button can give the best clamp size easily.
Product Image
Buy the new Washer Door Boot Seal WH08X10036 https://www.appliancepartspros.com/ge-door-boot-seal-wh08x10036-ap4334050.html
Follow these simple step-by-step instructions to replace the Washer Door Boot Seal WH08X10036 on General Electric, Hotpoint, RCA, Sears, and Kenmore washers.
Symptoms: Has a hole in it; you’re getting water on the floor.
Buy the new Washer Door Boot Seal WH08X10036 https://www.appliancepartspros.com/ge-door-boot-seal-wh08x10036-ap4334050.html Most orders delivered in 2 business days or less.
Tools needed: Phillips screwdriver, flathead screwdriver, 1/2” socket, locking pliers.
This Whirlpool made Washer Door Boot Seal replaces the following older part numbers: WH08X10022, 1394050, AH1766023, EA1766023, PS1766023, WH08X10040.
https://ddmgaragedoors.com/springs/standard-torsion-springs.php#database
To buy standard garage door torsion springs
- – SAFETY WARNING: PLEASE READ DETAILS BELOW BEFORE ATTEMPTING – -
CAUTION!
Replacing garage door torsion springs is dangerous because the springs are under tension. The directions in this video hopefully will help guide you in safely replacing your springs, but there are no guarantees. It is impossible to cover every dangerous situation you may encounter. If you fail to use the right tools or if you don’t follow safe procedures, you could lose hands, limbs or even your life. You could also damage property.
Doing the job right is your responsibility. We recommend that you carefully study all the instructions and warnings at https://ddmgaragedoors.com/diy-instructions/replace-garage-door-torsion-springs.php before beginning your work. If you have any doubts about your ability to safely change your springs, we recommend you hire a professional to repair your garage door.
Safety First!
Are your garage door springs broken? Are you handy with tools and your hands and want to save some money by replacing them yourself? There are some serious dangers in replacing springs from a garage door. These springs are under tension and can cause bodily injury or death. However, if you’re skilled with your hands and want to try installing them yourself, here is an instructional video on how to do it safely and efficiently.
FOR YOUR SAFETY, FOLLOW THE INSTRUCTIONS ON THE VIDEO CAREFULLY.
*** Always stay out of the path of the winding bars and winding cone to prevent injury or death. ***
We are not responsible for any injury you might receive while replacing your garage door springs.
Safety Procedures:
1. Always wear safety glasses.
2. Unplug garage door opener.
3. Disengage opener from the door.
Necessary Tools:
1. A Pair of 1/2″ winding bars, taped at 1″ from the ends
2. A sturdy step ladder
3. A couple of vice grips
4. A set of appropriately-sized open-ended AND socket wrenches
5. A file
6. Tape measure
7. Oil can OR 3-in-1 oil
8. Light Spray Paint
9. Permanent Marker
Instructional Summary:
1. Establish Safety
2. Measure Springs
3. Unwind Your Unbroken Spring
4. Loosen Torsion Hardware
5. Replace Both Springs
6. Secure Torsion Hardware
7. Tension Both Springs
8. Test Door Operation
For other free tutorials on how to repair, replace, or maintain your garage door, visit https://ddmgaragedoors.com/diy-instructions/
If you want to order other parts for your garage door, visit us at https://ddmgaragedoors.com/parts/
Video Recorded and Produced by Mike Herbert
Tutorials – https://ddmgaragedoors.com/diy-instructions/
Garage Door Parts – https://ddmgaragedoors.com/parts/
Garage Door Springs – https://ddmgaragedoors.com/springs/garage-door-springs.php
Dock Leveler Parts – https://ddmgaragedoors.com/dock-leveler-parts/