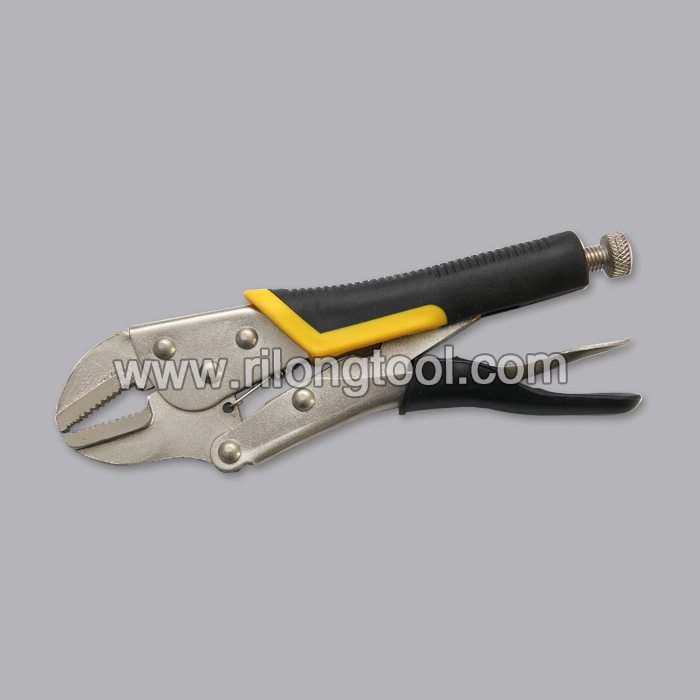
Factory selling 10″ Backhand Flat-nose Locking Pliers with Jackets Supply to Swiss

Short Description:
Product Detail
Product Tags
abide by the contract", conforms to the market requirement, joins in the market competition by its high quality as well as provides more comprehensive and excellent service for clients to let them become big winner. The pursue of the company, is the clients' satisfaction for Factory selling 10″ Backhand Flat-nose Locking Pliers with Jackets Supply to Swiss, Welcome your visiting and any your inquires,sincerely hope we can have chance to cooperate with you and we can build up long well business relationship with you.
Basic Information
■Model Number: RL-DLQ015
Additional Information
■Material: A3# steel (Q235) or 45# steel
■Size: 10”
■Surface Treatment: Nickel-plated, Zinc-plated, Black Oxide, Electrophoresis
■Heat Treatment: Optional
■Package: Blister Card, Suction Card, Tie Card, Double Blister Card
■OEM: Acceptable
■HS Code: 8203200000
■Samples: For FREE
■Delivery Time: Always 30 working days depending on the order quantity
■Packing: By standard cartons
Product Description
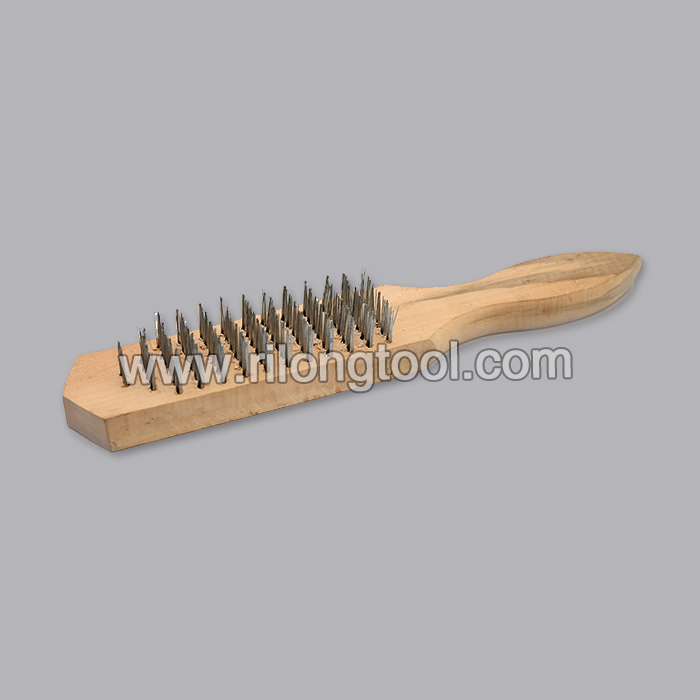
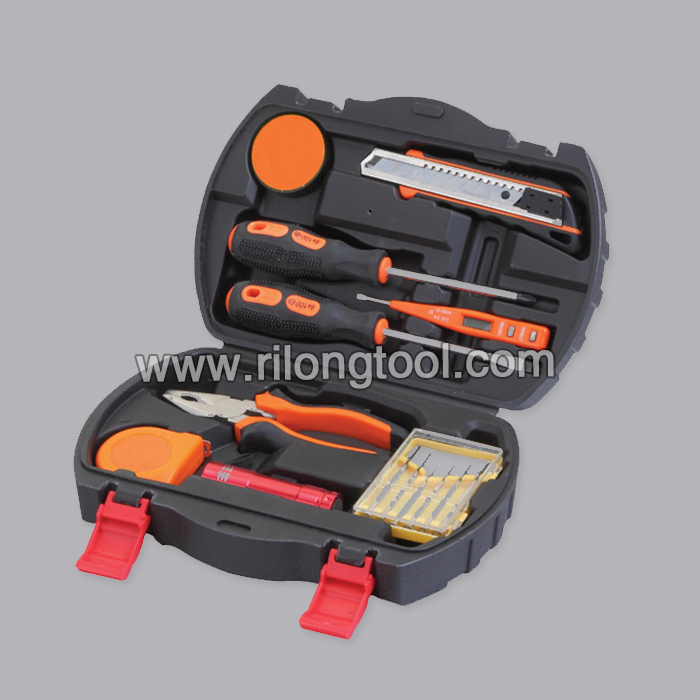
■Mainly used for clamping parts to rivet, weld, grind and so on, which is characterized by the powerful clamp force produced by the jaw. It can lock tight so that the parts won’t fetch away. Besides, jaws have a lot of levels to adjust for the use of different thickness of parts, and it also can be used as a wrench.
■Flexible using, long life and good tenacity.
■The screw tuning button can give the best clamp size easily.
Product Image
Machine Shop Tool Making, Machining A Finger Plate Clamping Tool – Part 2, by Clickspring.
A Finger Plate clamping tool is a valuable tool in any workshop, and is a great mini mill and mini lathe project. In this second and final part of the Finger Plate clamping tool build, I finish off the tool, by making the clamping finger, lifting screw and drilling jig bushings.
Thanks for watching. If you enjoyed the video please give a thumbs up, and leave me a comment.
If you would like to help support the creation of these videos, then head on over to the Clickspring Patreon page: https://www.patreon.com/clickspring
For more info on this tool build, as well as other tool making info, visit the blog site at https://www.clickspringprojects.com
Project Plans available from the Clickspring Store:
https://www.clickspringprojects.com/store.html
Other Videos to Watch:
How To Make A Clock Part 1 – Making The Frames
How To Machine A Small Lathe Carrier
Ask Me A Question:
https://www.clickspringprojects.com/contact.html
Follow Clickspring:
https://www.facebook.com/Clickspring1
https://plus.google.com/u/0/113668471124073837794/posts
https://instagram.com/clickspring1/
https://www.tumblr.com/blog/clickspring1
https://twitter.com/clickspring1
https://www.patreon.com/clickspring
Transcript:
00:28 Anyway first things first, it needs to be marked out on a strip of mild steel plate. The symmetry of the part means that if I mark off the various dimensions along a center line,
00:56 I can then construct the rest of the shape using an engineers square and protractor. I must get around to buying some radius gauges for marking out. In the meantime, this washer will do the trick. You can see I’m opening up four holes.
02:21 The two outer ones are for later threading, and the two inner ones will form the end curves of the internal slot.
02:52 To make the slot, I started out with an undersized slot mill, and then once I had broken through, I moved the cutter closer to the line on each side, to bring the slot to size.
03:18 So thats the inside cutting complete, now for the edges. The band saw takes care of most of the waste stock. And I used the belt sander and filing machine to bring it closer to the line.
04:00 I’ve left it a little short of the line , to
allow for a bit of finishing later. Now for those chamfered surfaces. First the depth of cut is marked out. And then its off to the mill.
04:45 This part is like the base; the surface of the raw stock is kind of rough. So I gave it a bit of time on some 240 grit paper, to clean it up and to leave a nice surface finish. And that’s the clamping finger complete. You can see how it can be swung around the stud, to bring either end into use.
05:26 Now for the Lifting screw thumb wheel. This one was made very much like the clamping nut. I started with the knurl; trimmed off the end, and then drilled and threaded the center.
06:07 Once parted off, it becomes a bit hard to hold, so I used this cap screw as a mandrel, and did the rest of the turning while it was on that. I used a graver to form the dome. And then gave it very light touch with some emery paper.
06:45 A bit of loctite holds the threaded rod in place, and that’s the tool basically done. All I need to finish the job, is a set of bushings for the cross hole jig.
07:08 Now the bushings are basically just a shouldered cylinder, with a hole drilled down the center, matching whatever size drill you intend to use for the cross hole.
08:33 I’ve faced off the end of the rod to have a look at the hole; As best as I can tell, its where it should be. The drilling feels quite stable, and the tool is easy to hold.
08:49 I can see this tool is going to get a lot of use on the belt sander and filing machine too. And if I’m working on something that tends to grab like brass, I can lock it down on the vise,and know that its going to sit tight.
References:
Finger Plate Clamping Tool books and plans (let me know if you are aware of any others):
“Workshop Practice Series Number 31″ Stan Bray
https://www.teepublishing.co.uk/books/workshop-practice-series/
“Tools For The Clockmaker And Repairer” John Wilding
https://www.ritetimepublishing.com/
“The Model Engineers Workshop Manual” George H Thomas
https://www.teepublishing.co.uk/books/in-your-workshop/model-engineers-workshop-manual/
“Model Engineer Magazine” Edition Vol 104, Issue 2596, 1951 Commander W.T. Barker
https://www.itech.net.au/modelengineer/
“The Machinist’s Bedside Reader” Guy Lautard
pages 88-91
Machine Shop Tool Making, Machining A Finger Plate Clamping Tool – Part 2
A basic guide to the most commonly depended on wrenches to buy for those interested in becoming apprentice mechanics and/or for automotive enthusiasts / do-it-yourself types..
Transcript provided for the hearing impaired:
Alright so today on Repairs101 — we’re going to talk about wrenches.
So you know I get quite a few requests from people asking about the kinds of tools they’re going to need to collect in order to start working as Mechanics — and I’ll tell you straight up: you’re going to need a lot of wrenches. So here we’re going to talk about the “Must haves”, the “Should haves” and even some of the “Might needs” of wrenches.
So the first thing I’ll say is: buy your wrenches in sets — and that is to save money. You’re going to need a variety of wrenches in both metric and SAE in a variety of handle lengths. So at the top of my list is combination wrenches and that’s because I find myself reaching for combination wrenches more often than any other tool. So it’s called a combination wrench because it’s a combination of the open end wrench and the ring wrench or box wrench. And, of course, what kind of equipment you’re working on will determine whether or not you might need very large wrenches or very small wrenches. You’re definitely going to need several sets with a variety of handle lengths in both metric and SAE. I highly recommend a set of Ratcheting wrenches and some Stubbies, even if you have to make your own. And you can always lock them together and do what’s called double wrenching.
So the next most important thing to have is a set of socket wrenches and I would say at the very least get yourself three-eights drive and half inch drive to start with. And included with socket wrenches are things like Torque wrenches and Impact wrenches, Breaker bars, Allen wrenches, Torx wrenches.
The next most basic thing to have is, of course, adjustable wrenches. You do want to try to limit your use of them because they have a tendency to slip and round off your hardware. But they will prove to be invaluable in their versatility, as will Pipe wrenches.
You’re going to need filter wrenches and failing that: a strap wrench.
After you’ve got yourself all the basics I would definitely go after a set of Flare-nut wrenches.
So you’ll find double open enders really handy and you want to collect them in different “offsets”.
Get all sorts of ring wrenches.
You’re going to want to invest in a chain wrench and probably a locking chain wrench.
And, of course, there’s no end of specialty tools that you’re going to need and, you know, there’s all kinds of tools that are designed to help you reach things in tight places. Again, what specialty wrenches you’re going to need will depend on what kind of equipment you’re working on.