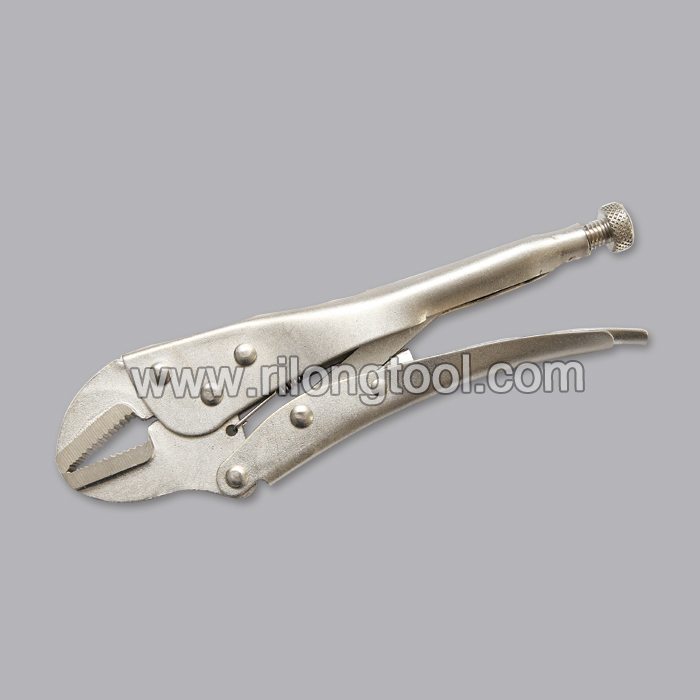
Factory provide nice price 7″ Backhand Round-Jaw Locking Pliers Factory for Toronto
Short Description:
Product Detail
Product Tags
All we do is always associated with our tenet " Customer first, Trust first, devoting on the food packaging and environmental protection for Factory provide nice price 7″ Backhand Round-Jaw Locking Pliers Factory for Toronto, items won certifications with the regional and international primary authorities .For far more detailed information,please contact us!
Basic Information
■Model Number: RL-DLQ004
Additional Information
■Material: A3# steel (Q235) or 45# steel
■Size: 7”
■Surface Treatment: Nickel-plated, Zinc-plated, Black Oxide, Electrophoresis
■Heat Treatment: Optional
■Package: Blister Card, Suction Card, Tie Card, Double Blister Card
■OEM: Acceptable
■HS Code: 8203200000
■Samples: For FREE
■Delivery Time: Always 30 working days depending on the order quantity
■Packing: By standard cartons
Product Description
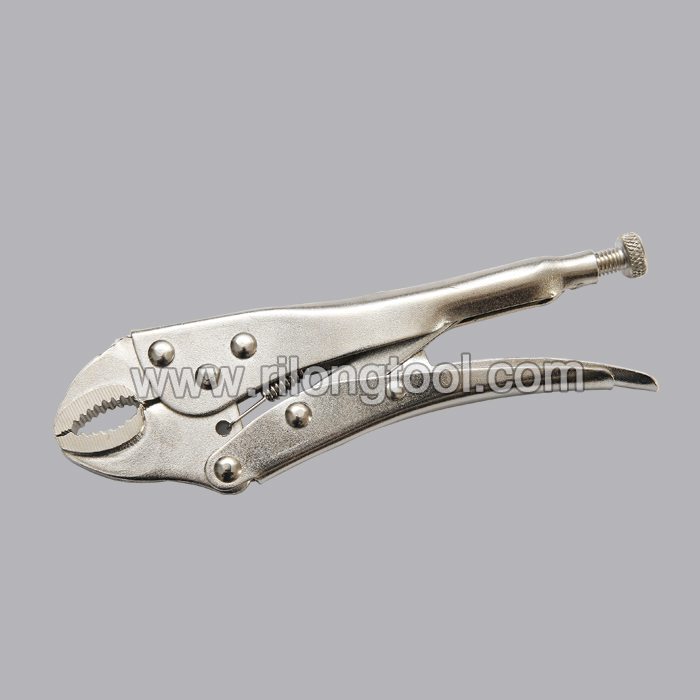
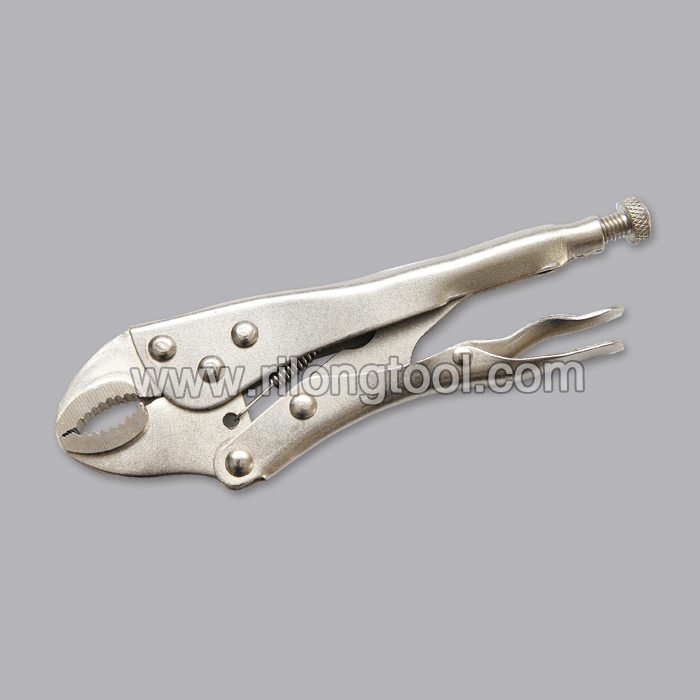
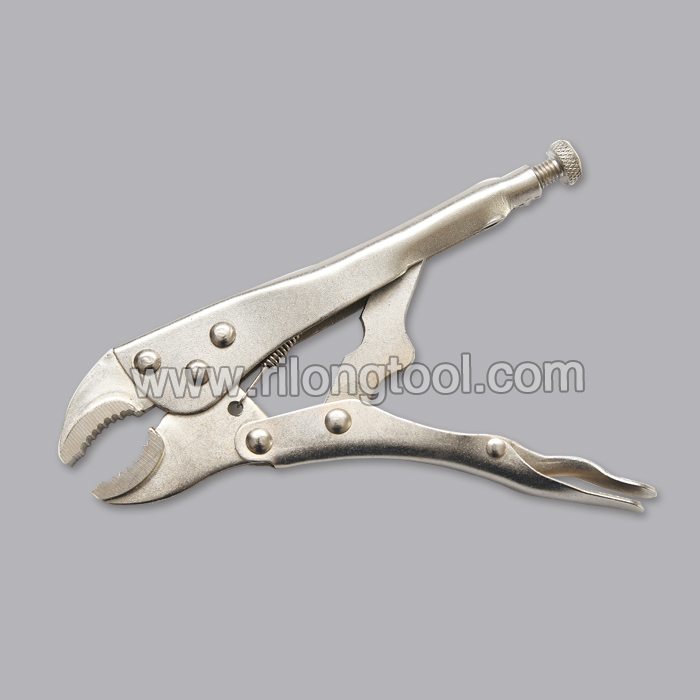
■Mainly used for clamping parts to rivet, weld, grind and so on, which is characterized by the powerful clamp force produced by the jaw. It can lock tight so that the parts won’t fetch away. Besides, jaws have a lot of levels to adjust for the use of different thickness of parts, and it also can be used as a wrench.
■Flexible using, long life and good tenacity.
■The screw tuning button can give the best clamp size easily.
Product Image
The nail knot is a fishing standard. It can be used to connect to very distinct diameter lines with great efficiency. Many people have a difficult tying this knot but thanks to the Tie-Fast Knot tool tying quality nail knots is easy. You can even tie a modified blood knot and use a nail knot to connect your fly to your tippet.
Watch the full episode: https://www.youtube.com/watch?v=HxPrA8aXyOY
Ask This Old House plumbing and heating expert Richard Trethewey helps a homeowner add a shower to a freestanding tub. (See below for a shopping list, tools, and steps.)
Click here to SUBSCRIBE to the official This Old House YouTube channel: https://www.youtube.com/subscription_center?add_user=thisoldhouse
Shopping List for How to Add a Shower to a Claw-Foot Tub:
- Chrome-plated tub-and-shower kit, including shower-curtain ring
- Copper pipe and assorted fittings
- Emery cloth, to clean copper pipe
- Lead-free solder and flux, for soldering copper pipe and fittings
- Teflon tape, to create a watertight seal on threaded fittings
- PVC primer and cement, for adhering plastic pipe and fittings
- Plumber’s putty, to create a watertight seal at tub drain[BR][BR]
- Shower curtain and rings
Tools for How to Add a Shower to a Claw-Foot Tub:
- Locking pliers
- Close-quarter tubing cutter, to cut copper pipe
- Pipe brush, to clean copper pipe
- Propane torch, for soldering
- Adjustable wrench, for tightening threaded fittings
- PVC handsaw, to cut plastic pipe
- Level, for plumbing up the shower arm
- Cordless drill
Steps for How to Add a Shower to a Claw-Foot Tub:
1. Turn off the water to the bathroom at the water main or well pump.
2. Use an emery cloth to buff clean the two water-supply pipes protruding from the floor.
3. Gently pull up on the hot-water supply pipe, then clamp locking pliers onto the pipe to hold it in position. Repeat for the cold-water pipe.
4. Cut both pipes to length with a close-quarter tubing cutter.
5. Use a pipe brush to clean the inside of a copper male adapter.
6. Apply flux to the inside of the adapter and to the outside of the hot-water supply pipe.
7. Press the adapter onto the end of the pipe, then use a propane torch and lead-free solder to solder the adapter to the pipe. Repeat to solder an adapter onto the cold-water pipe.
8. Wrap the threaded portion of each adapter with Teflon tape.
9. Slide an escutcheon over each pipe, then tighten a valve onto each adapter with an adjustable wrench. Release the locking pliers.
10. Turn the water back on and check for leaks.
11. Use a PVC handsaw to cut the plastic drainpipe slightly below the surface of the finished floor.
12. Adhere a PVC fitting onto the end of the drainpipe with PVC primer and cement.
13. Set the chrome-plated escutcheon over the fitting.
14. Wrap a rope of plumber’s putty around the threaded portion of the tub’s drain fitting.
15. Assemble and connect the tub’s drainpipe and overflow tube.
16. Install the new faucet to the tub wall, then connect both the hot- and cold-water supply pipes.
17. Tighten the showerhead onto the shower arm, then mount the shower arm to the tub faucet.
18. Attach an adjustable ceiling bracket to the shower arm.
19. Use a level to hold the shower arm perfectly plumb (vertical), then screw the bracket to the ceiling.
20. Connect the shower-curtain ring to the shower arm, then suspend the ring from the ceiling with vertical supports.
21. Install a shower curtain to the ring.
22. Attach a handheld showerhead to the tub faucet.
Follow This Old House and Ask This Old House:
Facebook: https://www.facebook.com/ThisOldHouse
Twitter: https://twitter.com/thisoldhouse
https://twitter.com/asktoh
Pinterest: https://www.pinterest.com/thisoldhouse/
G+: https://plus.google.com/+thisoldhouse/posts
Instagram: https://instagram.com/thisoldhouse
Tumblr: https://thisoldhouse.tumblr.com/