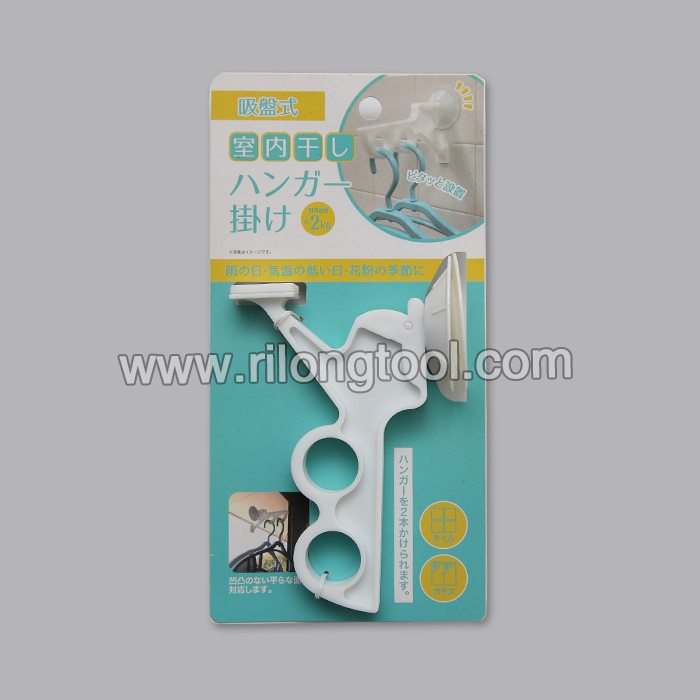
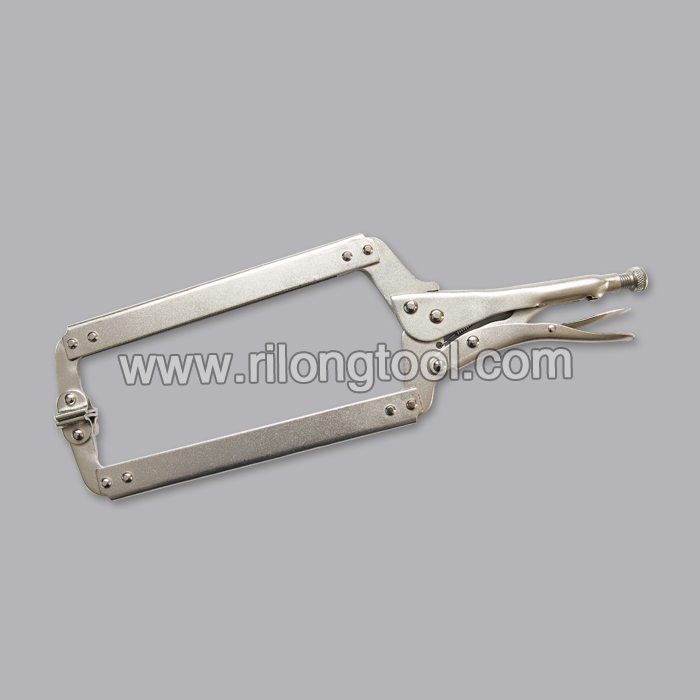
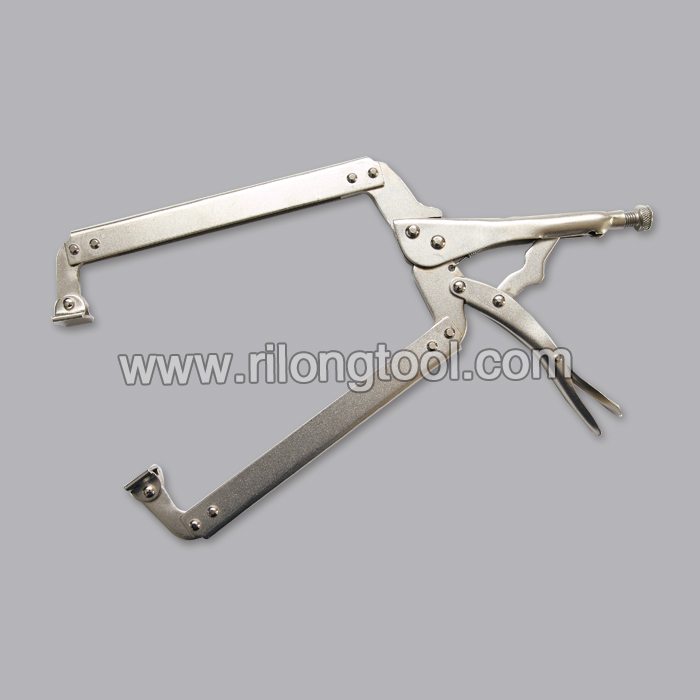
Factory directly supply 18″ C-clamp Locking Pliers for Portugal Manufacturers
Short Description:
Product Detail
Product Tags
Dedicated to strict quality control and thoughtful customer service, our experienced staff members are always available to discuss your requirements and ensure full customer satisfaction for Factory directly supply 18″ C-clamp Locking Pliers for Portugal Manufacturers, Welcome friends from all over the world come to visit, guide and negotiate.
Basic Information
■Model Number: RL-DLQ021
Additional Information
■Material: A3# steel (Q235) or 45# steel
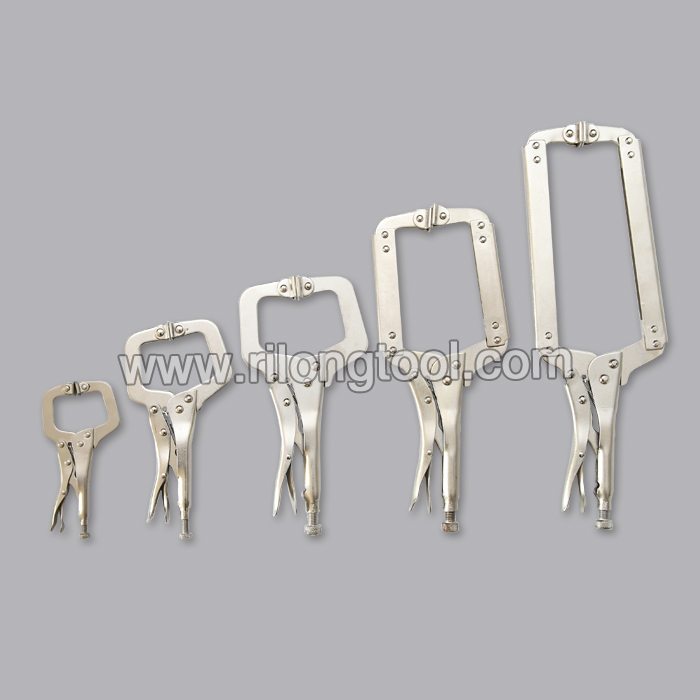
■Size: 18”
■Surface Treatment: Nickel-plated, Zinc-plated, Black Oxide, Electrophoresis
■Heat Treatment: Optional
■Package: Blister Card, Suction Card, Tie Card, Double Blister Card
■OEM: Acceptable
■HS Code: 8203200000
■Samples: For FREE
■Delivery Time: Always 30 working days depending on the order quantity
■Packing: By standard cartons
Product Description
■Mainly used for clamping parts to rivet, weld, grind and so on, which is characterized by the powerful clamp force produced by the jaw. It can lock tight so that the parts won’t fetch away. Besides, jaws have a lot of levels to adjust for the use of different thickness of parts, and it also can be used as a wrench.
■Flexible using, long life and good tenacity.
■The screw tuning button can give the best clamp size easily.
Product Image
Leave annotations on!
6th gen Civic ignition switch replacement , 1996-2000 Honda Civic ignition switch replacement in detail, step by step.
I saw that there were no video guides on how to do this on a Civic, but many guides on doing it in an Accord. My ignition switch was wearing out, so I figured I would make a video.
Here are the official recall instructions, procedure C. https://www.hondalac.com/service/Bulletins/x02-031e.pdf
Here is detailed info on the ignition switch system;
https://techauto.awardspace.com/ignitionswitch.html
About 1.5 minutes into this video, you can see the testing procedure to see if your ignition switch is worn out. https://www.youtube.com/watch?feature=player_embedded&v=UAREADz7BMA
annotations;
beginning; first remove the 3 screws, then do this
2:45; it went back together fine despite possibly breaking off a tab.
4:15; I cut that brown zip tie off since there was a replacement one that came with the kit
5:49, and I had to pull it out this way because of the small wire harness still connected to the steering column
6:47, Note that if you have a manual transmission, there are fewer small wires to remove than if you have an automatic transmission like me. Refer to the recall pdf in the video description for details.
7:03 Actually I tried a small flathead screwdriver on the connector end.
8:52, be sure to crimp them really well! What you see, I did not crimp it well enough. I recommend using either the proper crimp tool for those butt connector sizes, or using vice grips. I then used hot glue as a sort of epoxy as additional protection, and then finally Super88 electrical tape.
Alternatively, solder the wires instead of using butt connectors and use heat shrink and then electrical tape.
11:40, so far no new rattles
Subscribe and visit our weekly podcast for more tips https://itunes.apple.com/us/podcast/fix-it-home-improvement/id880903087?mt=2
I cover the steps on how to replace a Moen faucet cartridge on a single handle kitchen faucet. The steps are the same for a bath sink, tub or shower faucet with the same Moen cartridge.
The most popular Moen cartridge is the 1200 brass style or the 1225 plastic body. You can replace an old cartridge with either model. Another style cartridge from Moen is the PosiTemp. It is also for single handle faucets but has a built in anti-scald feature. It will not fit in the faucets that take a 1200 or 1225 style, so make sure to look at your old cartridge.
You will need some of the following tools to replace a Moen faucet cartridge: adjustable wrench, channel-lock pliers, open-ended wrench, flashlight, and screwdrivers.
Some kitchen faucets will have a series of pieces that need to be removed to get to the cartridge. They can include the handle, handle assembly, retainer ring, pivot nut, and spacers. It is a good practice to lay out each piece in the order you removed it, so reassembly is easier.
Some faucets may also have a retaining nut that needs to be unscrewed to get to the cartridge.
Once the handle is removed and the parts under the handle are removed, you will need to take out the retainer clip. This is a “U” shaped clip that holds the cartridge in place.
In most of the packaging of a new Moen cartridge is a small white plastic tool to help replace the old cartridge. Place the removal tool onto the old cartridge and seat it between the two ears that stick up on cartridge. Use pliers or a wrench to twist the tool and loosen the old cartridge.
Remove the plastic tool and grab the cartridge stem and pull it out of the valve.
To install the new cartridge, pull the stem out so it is in the open position. This makes it easier to push into the valve. Grease up the o-rings with plumbers grease. In old faucets, the buildup of minerals and rust can cut an o-ring if it is not greased up. This will also help add life to the o-rings. Plumber’s Grease is a silicone based grease that will lubricate and protect rubber parts. It also helps keep cartridges and valve stems from corroding. Vaseline and other petroleum based products are not recommended for any rubber parts. Petroleum based lubricants will swell and soften rubber parts and o-rings.
You need to align the ears sticking up on the new cartridge with the slot for the retainer clip. The clip needs to go around the ears to hold them in place. Replace the retainer clip.
Now replace all the parts that were removed and test the faucet.
If the hot and cold are reversed when you use the handle, only remove the handle and spin the stem 180 degrees. Do not remove the clip or cartridge, just spin the stem.