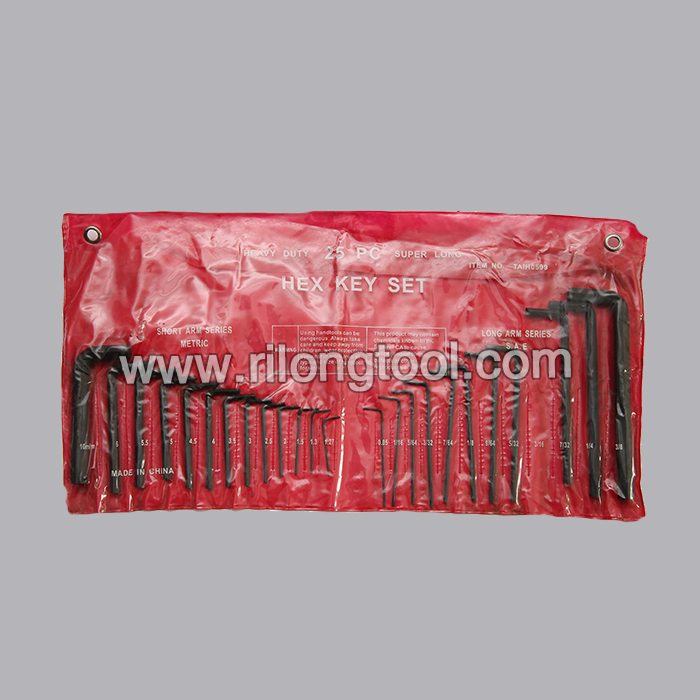
Factory directly provided 30-PCS Hex Key Sets packaged by BMC surface by Black Oxide to Southampton Manufacturers
Short Description:
Product Detail
Product Tags
Our target is to consolidate and improve the quality and service of existing products, meanwhile constantly develop new products to meet different customers' demands for Factory directly provided 30-PCS Hex Key Sets packaged by BMC surface by Black Oxide to Southampton Manufacturers, We have confident that we can provide the high quality products at resonable price, good after-sales service to the customers. And we will create a bright future.
Basic Information
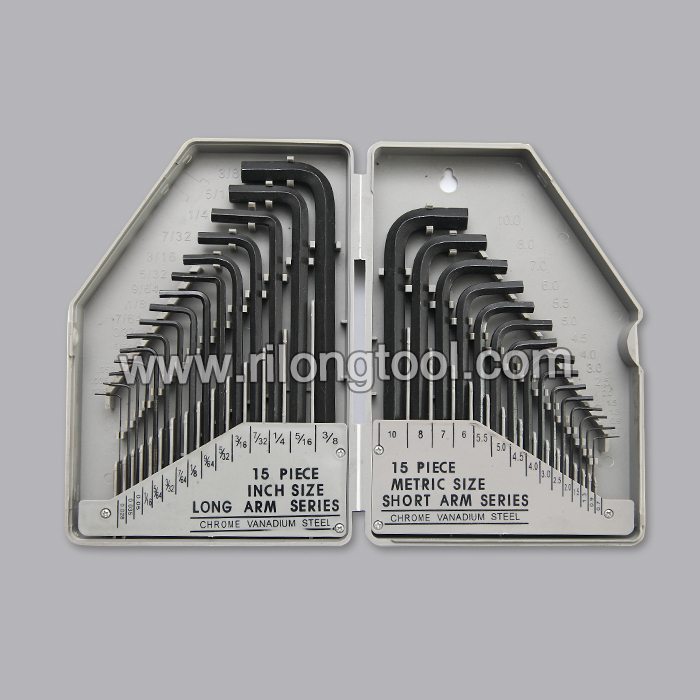
■Model Number: RL-NLJ015
Additional Information
■Material: 45# Carbon Steel
■Size: 0.028″-3/8″, 0.7mm-10mm
■Surface Treatment: Black Oxide
■Heat Treatment: Optional
■Package: BMC + Double Blister Card
■OEM: Acceptable
■HS Code: 8204110000
■Samples: For FREE
■Delivery Time: Always 30 working days depending on the order quantity
■Packing: By standard cartons
Product Description
■Ningbo Rilong Hardware Tools Factory can provide various kinds of Hex Key with different sizes and packages.
Product Image
Cheap & easy solution for hanging basic tools on your pegboard!
Buy a bag of 1/8″ tipped, 1″ long plastic wall anchors with screw nails included. Then press them in with your palm, insert the screw, or longer ones of your choice, and hang basic tools.
Use needle nose pliers if needed to remove.
In part one of our R6 engine rebuild series, we start with a bottom end rebuild. Here is a list of the parts you need: https://bit.ly/R6-Parts-List
You’ll also need this crankcase diagram for the R6: https://bit.ly/Crankcase-Diagram-R6
In this video, John begins to prepare the crankcase by installing head studs and bearings. He also assembles the transmission on the R6. Ahead in the next video, John will install a Wiseco 636 kit to add more displacement to the engine, translating to more power.
To buy OEM Yamaha motorcycle parts, click here: https://www.partzilla.com/parts/search/Yamaha/Motorcycle/parts.html?utm_source=youtube&utm_medium=video&utm_campaign=description_btf
VIDEO HIGHLIGHTS:
Installing head studs – 2:05
Replacing bearings – 3:25
Assembling the transmission – 5:15
In the video we’re working with a 2008 Yamaha YZF R6, but you may have similar steps for your machine. If you’re not sure whether these steps apply to your motorcycle, leave a comment and we’ll get back to you.
RELATED CONTENT:
Why a 636 kit?
https://youtu.be/O2a8faE0x0k
Yamaha R6 engine teardown:
https://www.youtube.com/playlist?list=PLazGjIO6R4vT361OrBqOtpwXf4dmdJ4Nj
Yamaha R6 engine rebuild part 2:
Yamaha R6 engine rebuild part 3: