Discountable price 10″ Backhand Flat-nose Locking Pliers with Jackets to New Delhi Manufacturers

Short Description:
Product Detail
Product Tags
As for competitive prices, we believe that you will be searching far and wide for anything that can beat us. We can state with absolute certainty that for such quality at such prices we are the lowest around for Discountable price 10″ Backhand Flat-nose Locking Pliers with Jackets to New Delhi Manufacturers, It is our great honor to meet your demands.We sincerely hope we can cooperate with you in the near future.
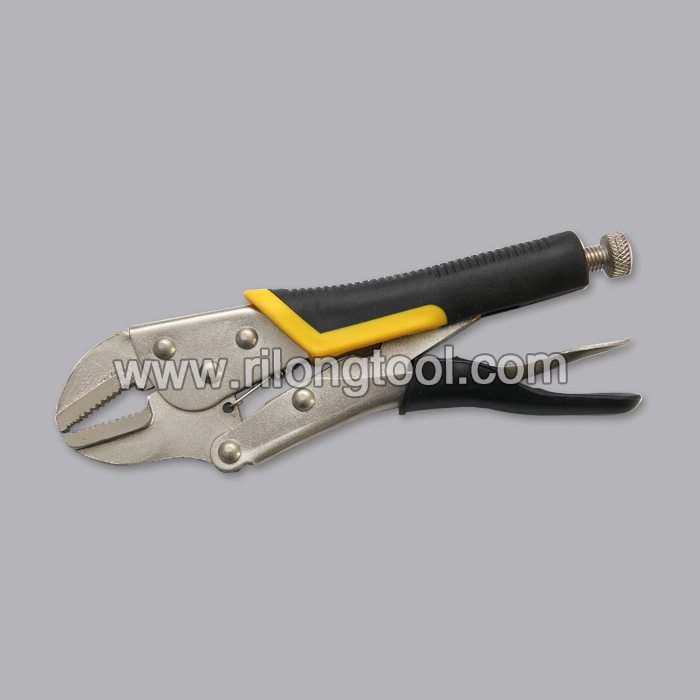
Basic Information
■Model Number: RL-DLQ015
Additional Information
■Material: A3# steel (Q235) or 45# steel
■Size: 10”
■Surface Treatment: Nickel-plated, Zinc-plated, Black Oxide, Electrophoresis
■Heat Treatment: Optional
■Package: Blister Card, Suction Card, Tie Card, Double Blister Card
■OEM: Acceptable
■HS Code: 8203200000
■Samples: For FREE
■Delivery Time: Always 30 working days depending on the order quantity
■Packing: By standard cartons
Product Description
■Mainly used for clamping parts to rivet, weld, grind and so on, which is characterized by the powerful clamp force produced by the jaw. It can lock tight so that the parts won’t fetch away. Besides, jaws have a lot of levels to adjust for the use of different thickness of parts, and it also can be used as a wrench.
■Flexible using, long life and good tenacity.
■The screw tuning button can give the best clamp size easily.
Product Image
How to Construct a Traditional Rosary using Swarovski Crystal Beads and Sterling Silver Wire. I regret that the pliers I recommend in this video are no longer made – at least I can’t find a source.
Video guide for disassembly, bearing replacement, and reassembly of Neo and Neo Ultimate Freehubs
==============
What you will need:
Smooth-jawed pliers or an axle vise
Blind bearing puller
Hammer
Punch
Bearing press with appropriate drifts
Small flat-tipped screwdriver
Assembly grease
Freehub grease
Cassette tool
Chain whip
Toothbrush
Gloves
================
Your freehub body should be removed a few times per year to be cleaned and lubricated. In this video, we will cover the complete disassembly and service of the freehub body.
Before removing your freehub body, remove the cassette from the wheel.
To remove the freehub body, grip the body with your hand and pull away from the hubshell.
The axle may pull out of the hub with the freehub body. If this happens, pull the axle out of the freehub body and set aside for later use.
The red freehub spacer may remain against the drive side hubshell bearing. If so, remove it and set it aside for later use.
If the axle remains in place, remove it from the shell and set aside along with the red freehub spacer.
If any of these pieces are too difficult to remove by hand, you may use an axle vise or smooth-jawed pliers to remove them
Remove the comolded seal from the hubshell with a small flat-tipped screwdriver.
Clean the drive ring, and co-molded freehub seal with isopropyl alcohol, and a clean rag and set aside for later use.
Wipe excess grease from your freehub body.
Using a small flat-tipped screw driver, pry the pawl retaining ring off of the freehub body.
Slide the pawls, and then pawl springs, out of their respective pockets in the freehub body.
Thoroughly clean the pawls, pawls springs, and pawl pockets in the freehub body with isopropyl alcohol, a toothbrush, and a clean rag.
To remove the bearings, start by removing the rubber seal adjacent to the outboard bearing with a small flathead screwdriver
Insert 15mm Sealed Bearing Extractor into one of the freehub bearings. Tap Extractor and bearing out of hub shell using punch and hammer. Perform this step over a rag as the bearing, extractor, and inner axle sleeve will fall from the hub shell when the bearing is removed.
Thoroughly clean freehub body bore, and freehub sleeve, with isopropyl alcohol and a clean rag.
Apply a thin layer of grease to the bearing bore
Press the bearings in, one at a time, using a bearing press and the appropriate drifts. Don’t forget to install the axle sleeve between the two bearings.
Reassemble the freehub by first installing the pawl springs, and then the pawls.
Install the pawl retaining ring into its groove in the freehub body.
Small grooves and burrs from the cassette’s contact with the freehub will not affect hub performance, and can be gently filed down to allow easier cassette installation
Apply a thin layer of freehub grease to the drive ring and freehub pawls
Reinstall the co-molded seal to the hubshell
Reinstall the axle and freehub body spacer
Install the freehub body onto the axle and insert into the hubshell by gently pressing down and twisting clockwise
Lastly, reinstall your endcaps