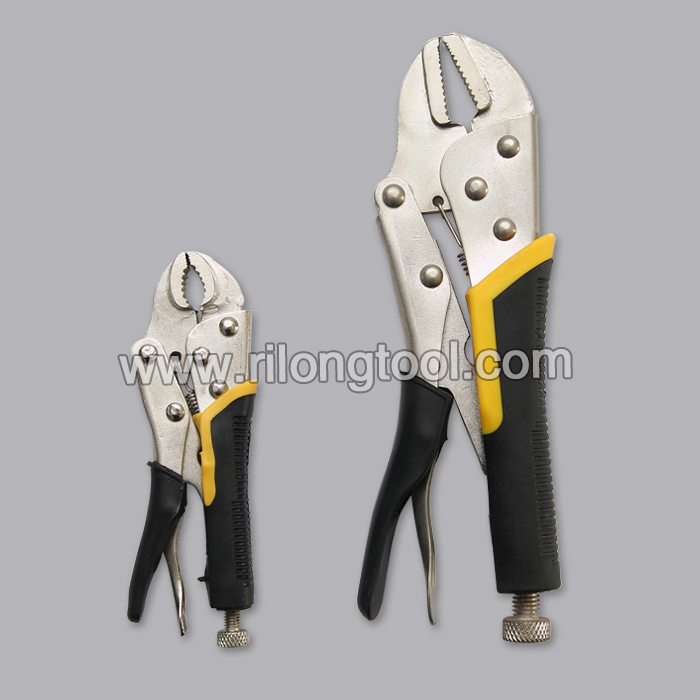
20 Years manufacturer 2-PCS Locking Pliers Sets with Jackets Factory for Switzerland
Short Description:
Product Detail
Product Tags
We are experienced manufacturer. Wining the majority of the crucial certifications of its market for 20 Years manufacturer 2-PCS Locking Pliers Sets with Jackets Factory for Switzerland, We stick to providing integration solutions for customers and hope to build long-term, stable, sincere and mutual beneficial relationships with customers. We sincerely look forward to your visit.
Basic Information
■Model Number: RL-DLQ026
Additional Information
■Material: A3# steel (Q235) or 45# steel
■Size: 5”, 6.5″, 7″, 10″
■Surface Treatment: Nickel-plated, Zinc-plated, Black Oxide, Electrophoresis
■Heat Treatment: Optional
■Package: Blister Card, Suction Card, Double Blister Card
■OEM: Acceptable
■HS Code: 8203200000
■Samples: For FREE
■Delivery Time: Always 30 working days depending on the order quantity
■Packing: By standard cartons
Product Description
■Mainly used for clamping parts to rivet, weld, grind and so on, which is characterized by the powerful clamp force produced by the jaw. It can lock tight so that the parts won’t fetch away. Besides, jaws have a lot of levels to adjust for the use of different thickness of parts, and it also can be used as a wrench.
■Flexible using, long life and good tenacity.
■The screw tuning button can give the best clamp size easily.
Product Image
Lets take a look at whats involve with removing the Engine Crankshaft Harmonic Balancer for it crankshaft snout. Here is a simple a easy method for removing most car and engine crankshaft pulley. HOW TO REMOVE A CRANKSHAFT PULLEY?.” The instruction application will be required to service the engine timing belt and it tensioner pulley. Using a 27mm IMPACK Socket and a 1/2 by 3 feet Breaker-Bar with a locking pliers. Care must be taken into consideration to not break the crankshaft harmonic balancer leading edges.
“The balancer can not break . it is steel . only a un-skilled hand may break it. Cracking the engine with parts and wires dis-connected might lead to more problems. plus by locking the balancer with the vise grip is an effort to identify if the isolator between it ring is in good condition. Sometime the rubber isolator between the two ring will become deteriorated and using our method of removal will hep the mac find out if the balancer is prone to failure in the near future. thank you for viewing the video. ”
It’s good to have the tools you need.
Leatherman Rebar specs / features:
Stainless steel body or stainless with black oxide coating
Full-size combination pliers (needle nose and regular)
Electrical crimper… I missed this in the video.
Removable and replaceable 154CM stainless steel soft and hard-wire cutter
Locking blade and scissors
420HC straight edge knife blade
420HC serrated knife blade
Bottle and can opener with v-notch wire stripper
Full-size Phillips screwdriver
Medium and large slotted screwdrivers
Wood-cutting saw
Wood and metal file
Awl with thread loop
Blade length is 2.75″ and the multi-tool closes to 4″ in length. Total weight is 6.7 oz.
Facebook ► https://www.facebook.com/gunsknivessurvival.gks
Facebook Fan Page► https://www.facebook.com/GunsKnivesSurvival
Twitter ► https://www.twitter.com/GKS_YouTube
Website ► https://www.gunsknivessurvival.com
Need Gear? ► https://www.gunsknivessurvival.com/Gear


